
")


Dealing with a leaky car radiator can be frustrating and costly. However, with the right guidance, you can tackle this issue on your own. This comprehensive DIY guide will walk you through the process of identifying and fixing a radiator leak, helping you save time and money.
Understanding the basics of your vehicle’s cooling system is essential to making the necessary repairs. By following this guide, you’ll gain the confidence to address the issue and get back on the road.
Key Takeaways
- Understand the basics of your vehicle’s cooling system
- Identify the signs of a radiator leak
- Learn safety precautions for DIY repair
- Discover various methods for repairing a radiator leak
- Gain confidence in tackling this common car issue
Understanding Car Radiators and Their Functions
The car radiator is a vital component of the vehicle’s cooling system, and understanding its functions is key to diagnosing and fixing leaks. A radiator’s primary role is to dissipate heat from the coolant, ensuring the engine operates within a safe temperature range.
What is a Car Radiator?
A car radiator is a type of heat exchanger that allows the coolant to flow through it, transferring heat to the surrounding air. It’s typically located at the front of the vehicle and is connected to the engine via hoses. The radiator is made up of tubes and fins, which increase its surface area to enhance heat dissipation.
How Does a Radiator Work?
The radiator works by circulating coolant through its tubes. As the coolant flows, it absorbs heat from the engine. The heated coolant then enters the radiator, where the heat is transferred to the tubes and fins. Air passing over the fins cools the tubes, thereby cooling the coolant. This cooled coolant is then recirculated back into the engine, maintaining an optimal operating temperature.
Key components that facilitate this process include the water pump, which circulates the coolant, and the thermostat, which regulates the engine’s temperature by controlling coolant flow.
Common Types of Radiators
There are several types of radiators used in vehicles, including:
- Downflow Radiators: These are traditional radiators where the coolant flows from top to bottom.
- Crossflow Radiators: In these radiators, the coolant flows from side to side, offering improved performance in certain vehicle configurations.
- Double-Pass Radiators: These radiators allow the coolant to pass through the radiator twice, enhancing cooling efficiency.
Understanding these different types can help in identifying the right repair strategies for radiator leaks, a crucial step in radiator leak repair and car radiator leak troubleshooting.
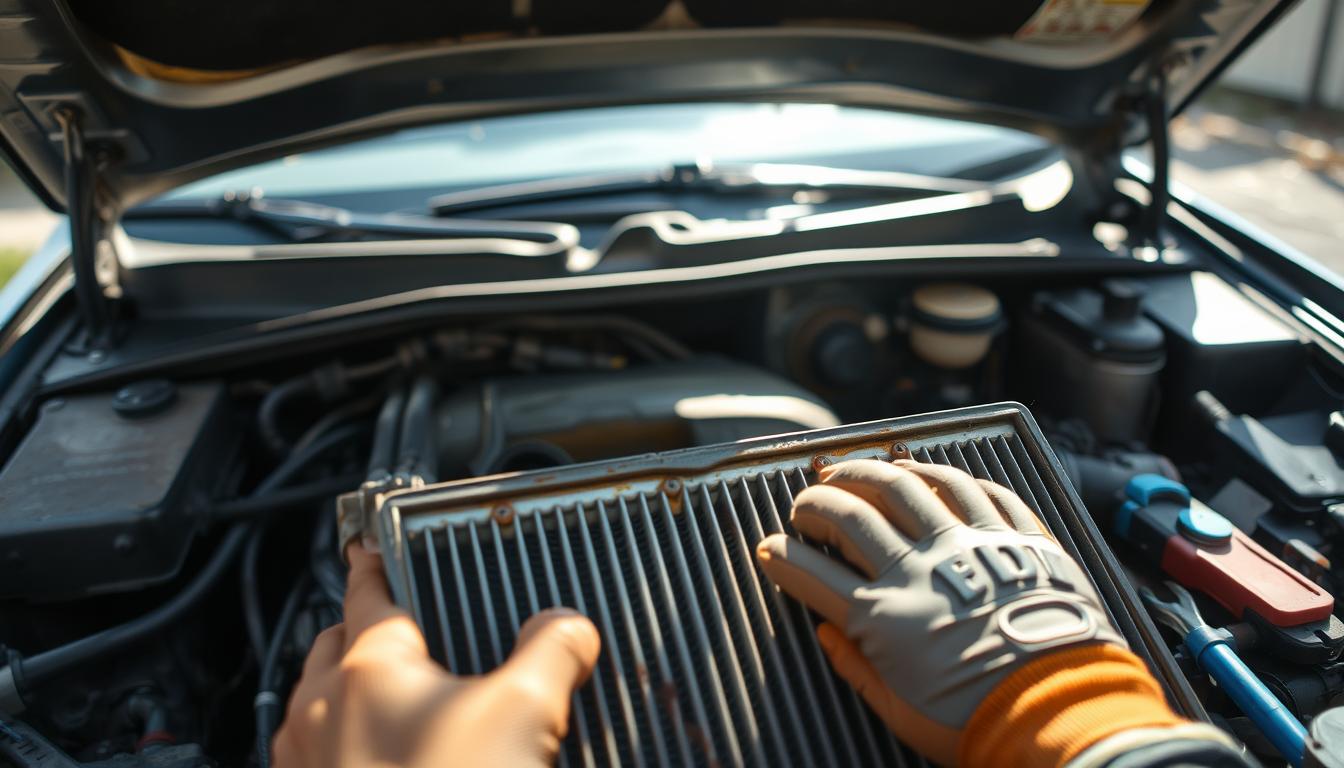
Identifying a Radiator Leak
Detecting a radiator leak early is crucial for preventing further damage to your vehicle’s cooling system. A leak can lead to overheating, engine damage, and potentially costly repairs. In this section, we’ll guide you through the signs of a radiator leak, the tools needed for inspection, and how to perform a visual inspection.
Signs of a Radiator Leak
There are several indicators that may suggest a radiator leak. These include:
- Coolant Leaks: Visible signs of coolant on the ground or on the radiator itself.
- Overheating Engine: If your engine temperature gauge is higher than normal, it could indicate a leak.
- Low Coolant Level: Consistently low coolant levels without an obvious reason.
- Visible Rust or Corrosion: Rust or corrosion on the radiator or its hoses.
Being aware of these signs can help you identify a potential leak before it becomes a major issue.
Tools Needed for Inspection
To inspect your radiator for leaks, you’ll need the following tools:
| Tool | Purpose |
|---|---|
| Flashlight | Illuminates dark areas around the radiator. |
| Gloves | Protects your hands from sharp edges and coolant. |
| Pressure Tester | Tests the radiator and cooling system for leaks under pressure. |
| Coolant Leak Detector | UV dye or other detection methods to identify leaks. |
How to Perform a Visual Inspection
Performing a visual inspection involves checking the radiator, hoses, and connections for signs of leaks or damage. Here’s a step-by-step guide:
- Ensure the Engine is Cool: Never inspect a hot engine or radiator.
- Visually Inspect the Radiator: Look for signs of rust, corrosion, or damage.
- Check the Hoses: Inspect hoses for cracks, soft spots, or leaks.
- Use a Pressure Tester: Pressurize the cooling system to detect leaks.
- Inspect the Radiator Cap: Ensure it’s not damaged or loose.

By following these steps, you can effectively identify a radiator leak and take the necessary steps towards fixing it, ensuring your vehicle’s cooling system operates efficiently.
Safety Precautions Before Starting
Safety should always be your top priority when working on your vehicle, especially when dealing with radiator leaks. Ensuring you’re properly equipped and informed can make the difference between a successful repair and a hazardous situation.
Required Safety Gear
When working with radiators, it’s essential to wear the right protective gear. This includes gloves to protect your hands from sharp edges and chemicals, safety glasses to shield your eyes from debris or coolant splashes, and a face mask to prevent inhalation of harmful fumes. Additionally, wearing long sleeves and pants can provide extra protection against spills and sharp objects.
Cooling System Precautions
The cooling system of your vehicle is under pressure, and the coolant can be extremely hot. Before starting any repair, ensure the engine is cool. Never remove the radiator cap when the engine is hot, as this can cause severe burns. It’s also crucial to understand that some coolants are toxic, so handling them requires care.
Working in a Safe Environment
Creating a safe working environment is just as important as wearing the right gear. Ensure your workspace is well-ventilated to prevent inhalation of fumes from the coolant or any repair materials. Keep the area clean and clear of clutter to avoid accidents. It’s also advisable to work in a well-lit area to see what you’re doing clearly.
By taking these precautions, you’ll not only ensure your safety but also make the repair process smoother and more efficient. Remember, safety is paramount when troubleshooting and repairing a car radiator leak.
Types of Radiator Leaks
Understanding the different types of radiator leaks is crucial for effective repair. Radiator leaks can manifest in various forms, each with its own set of challenges and repair requirements.
Pinholes and Small Cracks
Pinholes and small cracks are among the most common types of radiator leaks. These tiny openings can develop due to corrosion, wear and tear, or manufacturing defects. Identifying these leaks early is vital to prevent coolant loss and engine overheating. Using a pressure test can help detect such leaks.

Hose and Fitting Leaks
Leaks can also occur in the hoses and fittings connected to the radiator. These leaks are often due to deterioration over time or damage from external factors. Inspecting hoses and fittings regularly can help identify potential leaks before they become major issues.
Radiator Core Issues
The radiator core is another area prone to leaks, often resulting from damage or corrosion. Repairing or replacing the radiator core requires careful consideration and the right techniques to ensure a lasting fix. In some cases, using a radiator sealant can be a temporary solution, but for a permanent fix, more extensive repairs may be necessary.
By understanding the type of radiator leak you’re dealing with, you can choose the best radiator leak repair techniques for your situation, ensuring a more effective and lasting repair.
Temporary Solutions for Radiator Leaks
Radiator leaks can be stressful, but there are temporary fixes to get you back on the road. While these solutions are not permanent, they can help manage the issue until a more thorough repair can be done.
Using Radiator Sealants
One common temporary solution is using radiator sealants. These products are designed to seal small leaks in the radiator. Radiator sealants can be effective for minor leaks and are available at most auto parts stores. To use, simply pour the sealant into the radiator, following the product’s instructions.
Duct Tape Method
Although it might sound unconventional, the duct tape method can be a quick fix for certain types of leaks. This method is best used for hose leaks or loose connections. By wrapping duct tape around the affected area, you can temporarily stop the leak. However, this is not a reliable long-term solution.
Water and Water Pump Additives
Another temporary measure involves using water and water pump additives. In an emergency, you can top off your coolant with water, but be aware that this can lead to corrosion issues if not addressed. Some water pump additives can also help seal small leaks and improve the performance of your cooling system.
It’s essential to remember that these temporary solutions are just that – temporary. They are meant to help you get to a repair shop or deal with an emergency situation. For a lasting fix, a more thorough inspection and repair are necessary.
Necessary Tools for Repairing Radiator Leaks
Before diving into radiator leak repairs, it’s crucial to gather the required tools. Having the right equipment not only makes the process smoother but also ensures your safety while working on your vehicle.
Common Tools Needed
To start repairing a radiator leak, you’ll need some basic tools that are commonly found in most garages. These include:
- A socket set for loosening and tightening various bolts and nuts
- Pliers for gripping and bending objects
- A screwdriver set for removing screws and other fasteners
- A wrench set for tightening and loosening hoses and fittings
- A drain pan to catch any coolant that spills out during the repair
Specialized Tools for Repair
In addition to the common tools, there are some specialized tools that can make the repair process easier and more effective. These may include:
- A radiator pressure tester to help identify leaks
- A hose clamp tool for adjusting or removing hose clamps
- Epoxy or radiator sealant for sealing small cracks and leaks
Using the right radiator leak solutions can significantly improve the outcome of your repair.
Safety Equipment
Safety should always be your top priority when working on your vehicle. Some essential safety equipment includes:
- Gloves to protect your hands from cuts and chemicals
- Safety glasses to shield your eyes from debris and coolant splashes
- A face mask to prevent inhaling harmful fumes or particles
By having the necessary tools and safety equipment, you’ll be well-prepared to repair car radiator leak efficiently and safely.

Step-by-Step Guide to Repairing a Radiator Leak
To fix a radiator leak, you’ll need to follow a series of crucial steps that ensure a successful repair. This guide will walk you through preparing your car, draining the radiator fluid, and applying the chosen repair method.
Preparing the Car for Repair
Before starting the repair, ensure your car is parked on a level surface and apply the parking brake. Let the engine cool down completely to avoid any burns or injuries. Wear protective gear, including gloves and safety glasses, to protect yourself from potential splashes of radiator fluid.
Draining the Radiator Fluid
Draining the radiator fluid is a critical step before you can begin the repair. Locate the drain valve or petcock on your radiator, typically found at the bottom. Place a drip pan under the valve to catch the fluid, then open the valve to drain the radiator. Be sure to dispose of the used coolant properly, as it is toxic.
The process might vary slightly depending on your vehicle’s make and model, so consult your owner’s manual if you’re unsure.
Applying the Repair Method
Once the radiator is drained, you can proceed to apply the repair method. For small leaks, using a radiator sealant might be sufficient. For larger leaks or more significant damage, you might need to use epoxy or replace the radiator entirely.
- For radiator sealants, follow the product’s instructions for mixing and application.
- For epoxy repairs, ensure the area around the leak is clean and dry before application.
| Repair Method | Best For | Not Recommended For |
|---|---|---|
| Radiator Sealant | Small leaks, easy to apply | Large leaks, significant damage |
| Epoxy Repair | Medium-sized leaks, more durable | Very large leaks, may require professional help |
| Radiator Replacement | Significant damage, old radiators | Minor leaks, not cost-effective |
By following these steps and choosing the right repair method, you can effectively fix a radiator leak and get your car running smoothly again.
Repairing Small Leaks with Epoxy
For small radiator leaks, using epoxy is a practical DIY solution that can save time and money. Epoxy is a strong adhesive that can bond well with metal, making it an ideal fix for minor cracks and leaks in your car’s radiator.
Choosing the Right Epoxy
Not all epoxies are created equal, especially when it comes to fixing radiator leaks. You need an epoxy that is resistant to high temperatures and compatible with the materials used in your radiator. Look for epoxies labeled as “metal repair” or “high-temperature resistant.” Some popular brands include J-B Weld and Loctite Epoxy.

Application Process
Before applying epoxy, ensure the area around the leak is clean and dry. Sand the surface lightly to create a better bonding surface. Mix the epoxy according to the manufacturer’s instructions and apply it to the leak. Use a clamp or tape to hold the epoxy in place if necessary. It’s crucial to follow the DIY radiator leak repair best practices to ensure a lasting fix.
Curing Time
The curing time for epoxy can vary depending on the product and environmental conditions. Generally, it can take anywhere from a few minutes to several hours for the epoxy to fully cure. Be sure to check the manufacturer’s instructions for specific curing times and conditions. Keep the area dry and avoid putting stress on the repaired area until the epoxy is fully cured.
Replacing Damaged Radiator Hoses
Identifying and replacing damaged radiator hoses is essential for maintaining your car’s overall health. Damaged hoses can lead to leaks, causing your engine to overheat and potentially leading to costly repairs.
Identifying Damaged Hoses
To identify damaged hoses, inspect them for signs of wear, cracks, or leaks. Check the hoses’ connections to the radiator and engine for any signs of moisture or corrosion. A simple visual inspection can help you detect potential issues before they become major problems.
Some common signs of damaged hoses include:
- Cracks or frays in the hose material
- Soft or spongy texture
- Leaks or signs of moisture around the hose connections
- Corrosion on the hose fittings
Hose Replacement Process
Replacing a damaged radiator hose involves several steps. First, ensure your engine is cool before starting the replacement process. Then, follow these steps:
- Drain the coolant from the radiator to prevent spills.
- Loosen the hose clamps using a screwdriver or pliers.
- Remove the damaged hose from the radiator and engine connections.
- Inspect the connections for any signs of corrosion and clean them if necessary.
- Install the new hose, ensuring it is properly seated on the connections.
- Tighten the hose clamps securely.
- Refill the coolant and check for leaks.
According to a study by Car Maintenance Magazine, “Regular inspection and replacement of radiator hoses can prevent up to 30% of cooling system failures.”
| Tools Needed | Purpose |
|---|---|
| Screwdriver or Pliers | Loosening hose clamps |
| New Radiator Hose | Replacing the damaged hose |
| Coolant | Refilling the radiator |
Checking for Proper Fit
After replacing the hose, it’s crucial to check for a proper fit. Ensure the hose is not twisted or kinked and that the connections are secure. Start the engine and let it run for a few minutes to check for any leaks around the new hose.
“A properly fitted hose is key to preventing future leaks and ensuring your cooling system operates efficiently.”
By following these steps and regularly inspecting your radiator hoses, you can prevent leaks and maintain your car’s cooling system. For more complex issues or if you’re unsure about performing these repairs, consider consulting a professional mechanic.
When to Consider Radiator Replacement
Deciding whether to repair or replace a leaking car radiator can be challenging without understanding the signs that indicate a need for a new radiator. While repairs can be a cost-effective solution for minor leaks, there are instances where replacement is the more prudent choice.
Signs You Need a New Radiator
Several indicators suggest that your car’s radiator needs to be replaced rather than repaired. These include:
- Multiple Leaks: If your radiator has multiple leaks or the leak is significant, it may be more cost-effective to replace it.
- Age of the Radiator: Radiators have a lifespan. If yours is old or nearing the end of its expected life, replacement might be the better option.
- Corrosion: Extensive corrosion can weaken the radiator, making it prone to leaks and other issues, suggesting a need for replacement.
- Previous Repairs: If you’ve had to repair your radiator multiple times, it might be time to consider a new one to avoid recurring repair costs.

Cost Comparison: Repair vs. Replacement
Understanding the cost implications of both repair and replacement is crucial. Here are some factors to consider:
- Cost of Repair: For minor leaks, repair costs can be relatively low, involving sealants or epoxy repairs.
- Cost of Replacement: Replacing a radiator involves the cost of a new radiator, labor, and potentially coolant and other materials.
In many cases, if the radiator is old or the leak is significant, replacement is more cost-effective in the long run.
DIY vs. Professional Installation
When it comes to replacing a radiator, car owners must decide between DIY installation and hiring a professional. Here are some considerations:
- DIY Installation: Can be cost-effective but requires mechanical knowledge and the right tools. It’s a viable option for those comfortable with DIY car repairs.
- Professional Installation: While more expensive due to labor costs, professional installation ensures the job is done correctly and can provide warranty benefits.
Ultimately, the decision to repair or replace a radiator leak should be based on the severity of the leak, the age and condition of the radiator, and your comfort level with DIY repairs.
Maintaining Your Radiator After Repair
Maintaining your radiator after a DIY repair is crucial for extending its lifespan and ensuring your car’s cooling system works efficiently. Regular maintenance not only prevents future leaks but also keeps your car running smoothly.
Regular Maintenance Tips
To keep your radiator in good condition, follow these maintenance tips:
- Check the coolant level regularly and top it off as needed.
- Inspect the radiator hoses for signs of wear or damage.
- Ensure the radiator cap is in good condition and functions properly.
- Keep the radiator and surrounding area clean and free of debris.
Regularly checking these components can help you identify potential issues before they become major problems.
Signs of Future Problems
Being aware of the signs that may indicate future problems with your radiator can help you take proactive measures. Some common signs include:
- Coolant leaks or spills under the vehicle.
- Overheating engine, indicated by the temperature gauge or warning lights.
- Discoloration or rust on the radiator or hoses.
- Unusual noises coming from the radiator area.
If you notice any of these signs, it’s essential to address them promptly to prevent further damage.
Importance of Coolant Levels
Maintaining the correct coolant level is vital for the proper functioning of your radiator and cooling system. Low coolant levels can lead to overheating, which can cause significant damage to your engine.
| Coolant Level | Effects on the Radiator | Recommended Action |
|---|---|---|
| Low | Overheating, potential engine damage | Check for leaks, top off coolant |
| Normal | Optimal cooling system performance | Regularly check coolant level |
| High | Potential for pressure issues, leaks | Bleed the system, check for blockages |
As emphasized by a leading automotive expert, “Regular maintenance of your car’s cooling system is not just about preventing overheating; it’s about ensuring the longevity of your engine.”
“A well-maintained cooling system is crucial for the overall health of your vehicle. Neglecting it can lead to costly repairs down the line.”
By following these maintenance tips and being vigilant about signs of future problems, you can significantly extend the life of your radiator and ensure your car’s cooling system operates efficiently.
Conclusion and Encouragement for DIY Repairs
Repairing a car radiator leak is a manageable task when you have the right guidance. By following the steps outlined in this guide, you can successfully fix the issue and get back on the road.
Key Steps to Success
The process involves identifying the leak, preparing your car for repair, and applying the appropriate fix. Whether you’re dealing with a small pinhole or a damaged hose, the key is to act quickly to prevent further damage.
Benefits of Taking Action
By embracing DIY radiator repair, you can save money on costly mechanic fees and gain a sense of accomplishment. Fixing radiator leaks on your own also allows you to understand your vehicle’s cooling system better, making you more self-sufficient on the road.
Final Tips for a Successful Repair
When learning how to repair radiator leak, remember to stay safe by wearing protective gear and working in a well-ventilated area. Regular maintenance after the repair will help prevent future issues. With these skills, you’ll be well-equipped to handle similar tasks in the future, making you a more confident DIY enthusiast.


