
")


Replacing a car alternator might seem like a daunting task, but with the right guidance, it’s a manageable DIY project that can save you money and enhance your understanding of your vehicle’s electrical system.
By taking on this project yourself, you’ll not only cut down on labor costs but also gain hands-on experience with your vehicle’s electrical components. This DIY guide is designed to walk you through the process step by step, making it easier to understand and execute.
Knowing how to replace a car alternator is an essential skill for any vehicle owner, as it allows you to maintain your vehicle’s health and avoid being stranded due to a faulty alternator.
Key Takeaways
- Replacing a car alternator is a feasible DIY project.
- Doing it yourself can save you money on labor costs.
- Gaining hands-on experience enhances your understanding of your vehicle’s electrical system.
- This DIY guide provides a step-by-step approach to replacing a car alternator.
- Having this skill is essential for maintaining your vehicle’s health.
Understanding the Role of an Alternator
As a vital part of your car’s electrical system, the alternator’s primary role is to recharge the battery and supply power to various electrical components.
What is an Alternator?
The alternator is an electrical generator that converts mechanical energy into electrical energy. It is typically driven by the engine’s serpentine belt.
Key components of an alternator include:
- Rotor: The moving part that generates the magnetic field.
- Stator: The stationary part where the electrical current is induced.
- Diode rectifier: Converts AC voltage to DC voltage.
- Voltage regulator: Ensures the output voltage is within the required range.
How Does an Alternator Work?
The alternator works by using the engine’s mechanical energy to generate electrical energy. As the serpentine belt turns the alternator’s rotor, it creates a magnetic field that induces an electrical current in the stator windings.

This process results in an alternating current (AC), which is then converted to direct current (DC) by the diode rectifier. The voltage regulator ensures that the DC output is within the required voltage range, typically between 13.5 and 14.5 volts for most vehicles.
Signs of a Failing Alternator
Recognizing the signs of a failing alternator can help you diagnose and address issues before they lead to more significant problems. Common signs include:
- Dim or flickering headlights.
- Dead battery, especially if the battery is relatively new.
- Strange noises, such as whining or grinding sounds.
- Dashboard warning lights, including the battery or alternator warning light.
- Electrical issues, like malfunctioning accessories or erratic gauge readings.
If you notice any of these symptoms, it’s essential to have your alternator checked and potentially replaced to avoid being stranded with a dead vehicle.
Gathering Necessary Tools and Supplies
A successful DIY alternator replacement begins with having the correct tools and supplies at hand. This not only makes the process smoother but also ensures your safety while working under the hood.
Essential Tools for the Job
To replace your car’s alternator, you’ll need a set of essential tools. These include a socket set, a wrench set, and a belt tool for handling the serpentine belt. Having the right tools can significantly simplify the replacement process.
- Socket set
- Wrench set
- Belt tool
- Multimeter for testing voltage
Parts Needed for Replacement
The most critical part for the replacement is the new alternator itself. Ensure it’s compatible with your vehicle’s make and model. You may also need a new serpentine belt if the old one is worn out or damaged.
| Part | Description |
|---|---|
| New Alternator | Compatible with your vehicle’s make and model |
| Serpentine Belt | Replace if worn out or damaged |
Safety Gear to Use
Safety should be your top priority when working on your vehicle. Wear protective gear such as gloves and safety glasses to protect yourself from potential hazards.
- Gloves
- Safety glasses
- Closed-toe shoes

By gathering the necessary tools and supplies, you’re taking the first step towards a successful DIY alternator replacement. This preparation will help ensure that the process is as smooth and safe as possible.
Preparing Your Vehicle for Alternator Replacement
Before diving into the alternator replacement process, it’s crucial to prepare your vehicle to ensure a smooth and safe repair. This step is often overlooked but is vital for a successful DIY project.
Disconnecting the Battery
The first step in preparing your vehicle is to disconnect the battery. This is a safety precaution to prevent any accidental engine starts or electrical shocks. To do this, you’ll need to locate the battery and loosen the nut on the negative (black) cable clamp using a wrench. Once loose, pull the clamp off the battery post and secure it away from the battery to prevent it from accidentally coming into contact with the post again.
It’s also a good practice to check your vehicle’s manual for any specific instructions regarding battery disconnection, as some vehicles may have particular requirements.
Securing the Vehicle
After disconnecting the battery, secure your vehicle to prevent it from rolling or falling off the jack. If you’re working on a slope, ensure the parking brake is engaged and use wheel chocks for added safety. If your vehicle is on a jack, make sure it’s stable and consider using jack stands for extra security.
“Safety is not just a precaution, it’s a necessity when working under a vehicle.”
Locating the Alternator
Before you can replace the alternator, you need to locate it. The alternator’s position varies by vehicle make and model, so consult your vehicle’s repair manual or look for a diagram. Typically, it’s found near the front of the engine, connected to the serpentine belt. Take a moment to familiarize yourself with the surrounding components and the alternator’s connections.
| Step | Description |
|---|---|
| 1 | Disconnect the battery |
| 2 | Secure the vehicle |
| 3 | Locate the alternator |
By following these steps, you’ll be well-prepared to replace your car’s alternator safely and efficiently. Remember, preparation is key to a successful DIY repair.

Removing the Old Alternator
Now that you’ve prepared your vehicle, it’s time to remove the old alternator. This step is crucial for a successful DIY alternator replacement. The process involves a few key steps that need to be followed carefully to ensure a smooth replacement.
Loosening the Serpentine Belt
The first step in removing the old alternator is to loosen the serpentine belt. This belt drives several components in your engine, including the alternator. To loosen it, you’ll need to locate the tensioner pulley and release the tension. This is usually done using a socket wrench. Once the tension is released, you can remove the belt from the alternator pulley.

Disconnecting Wires and Connectors
After removing the serpentine belt, the next step is to disconnect the electrical wires and connectors attached to the alternator. This includes the main power output wire and any other connectors linked to the alternator. Make sure to note or label these connections so you can easily reconnect them to the new alternator.
Unbolting the Alternator
With the electrical connections disconnected, you can now unbolt the alternator from its mounting bracket. Use the appropriate socket or wrench to loosen and remove the bolts. Be prepared to support the alternator as you remove the last bolt, as it may fall if not supported.
| Step | Description | Tools Needed |
|---|---|---|
| 1 | Loosen the serpentine belt | Socket wrench |
| 2 | Disconnect electrical connections | Wrench or pliers |
| 3 | Unbolt the alternator | Socket or wrench |
By following these steps, you’ll be able to successfully remove the old alternator, paving the way for a successful charging system fix. Remember to handle the components with care to avoid any damage.
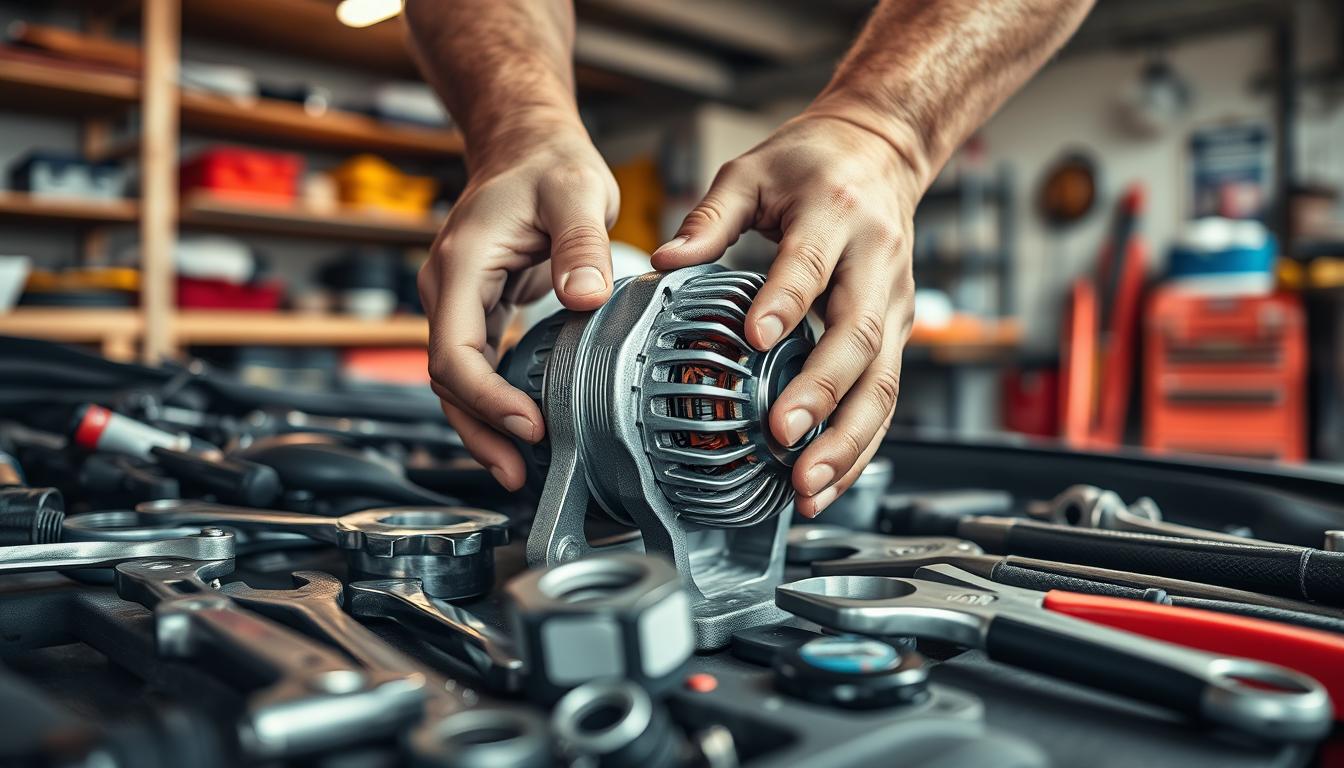
Installing the New Alternator
Now that you’ve removed the old alternator, it’s time to install the new one, a crucial step in getting your car back on the road. Installing a new alternator can seem daunting, but by following these steps, you can ensure a successful replacement.
Positioning the New Alternator
Begin by positioning the new alternator in its designated mounting bracket. Ensure it is aligned properly and the mounting holes are accessible for bolting.
- Check the alternator’s mounting bracket for any debris or corrosion.
- Gently place the alternator into its bracket, ensuring it is properly seated.
Reconnecting Wires and Belts
Once the alternator is in place, you can start reconnecting the wires and belts. This step is critical for the alternator’s operation and your vehicle’s electrical system.
- Reconnect the electrical connectors to the alternator, ensuring they are secure and not loose.
- Replace the serpentine belt, making sure it is properly aligned on the pulleys.
- Tension the belt according to the manufacturer’s specifications.
Ensuring Proper Alignment
Proper alignment of the alternator and its belt is crucial for the longevity of the component and the overall health of your vehicle’s engine.
- Check that the alternator is securely fastened and properly aligned.
- Verify the serpentine belt’s tension and alignment.
By following these steps, you can ensure a successful installation of your new alternator. Remember, if you’re unsure about any part of the process, it’s always best to consult a professional mechanic.

Testing the New Alternator
Testing the new alternator is a vital step in verifying that the replacement was done correctly. This process involves a few simple checks to ensure your new alternator is functioning as expected.
Reconnecting the Battery
The first step in testing the new alternator is to reconnect the battery. Make sure to connect the positive (red) cable to the positive terminal and the negative (black) cable to the negative terminal. Ensure the connections are tight and secure to avoid any issues during the test.
Starting the Engine
With the battery reconnected, start the engine and let it run for a few minutes. This allows the alternator to begin charging the battery and powering the electrical systems of your vehicle.
Checking Voltage Output
To verify that the alternator is working correctly, you’ll need to check its voltage output. Use a multimeter set to DC volts (around 20V scale) to measure the voltage across the battery terminals while the engine is running. A fully functional alternator should produce a reading between 13.5 and 14.5 volts.
Voltage Output Guidelines:
| Condition | Expected Voltage |
|---|---|
| Engine Off | Around 12.6V |
| Engine Running | Between 13.5V and 14.5V |
Note: If the voltage reading is significantly lower or higher than the expected range, it may indicate a problem with the alternator or the electrical system.
By following these steps, you can confidently verify that your new alternator is working correctly, ensuring your vehicle’s electrical system is functioning properly.
Common Mistakes to Avoid
Alternator replacement is a task that can be complicated by avoidable mistakes, but knowing what they are can make all the difference. When you’re fixing your car’s charging system, being aware of these pitfalls can save you time, money, and frustration.
Not Disconnecting the Battery
One of the most critical safety measures when working on your car’s electrical system is disconnecting the battery. Failing to do so can result in electrical shock or damage to the new alternator. Always start by disconnecting the negative terminal of the battery to prevent any accidental short circuits.
Incorrect Belt Tension
The serpentine belt’s tension is crucial for the proper functioning of the alternator. If the belt is too loose, it can slip and cause the alternator to malfunction. Conversely, if it’s too tight, it can damage the alternator’s bearings. Use a belt tension gauge to ensure the correct tension.
Skipping Tests After Installation
After installing the new alternator, it’s essential to perform tests to ensure it’s working correctly. Start the engine and use a multimeter to check the voltage output. This step helps you identify any issues early on, ensuring your car’s charging system is functioning properly.
By avoiding these common mistakes, you can ensure a successful alternator repair and a properly functioning charging system fix. This not only saves you from potential headaches but also ensures your vehicle remains in good condition.
Maintenance Tips for Longevity
Prolonging the life of your new alternator requires some simple maintenance tasks. By following these tips, you can ensure your vehicle’s electrical system remains in good condition.
Regular Inspections
Regular inspections are crucial for identifying potential issues before they become major problems. Check the alternator belt for signs of wear, such as cracks or fraying, and replace it if necessary. Also, inspect the electrical connections for corrosion or damage.
- Check the alternator belt for wear.
- Inspect electrical connections for corrosion.
- Look for signs of overheating or physical damage.
Cleaning the Alternator
Keeping the alternator clean can help prevent damage and ensure it operates efficiently. Use a soft brush or compressed air to remove dust and debris. Be cautious not to damage any components or connections.
When to Seek Professional Help
If you notice any signs of alternator failure, such as dimming lights, strange noises, or difficulty starting the engine, seek professional help immediately. A professional mechanic can diagnose the issue and perform any necessary repairs.
Key signs of alternator failure include:
- Dim or flickering headlights.
- Unusual noises from the alternator.
- Difficulty starting the engine.
By following these maintenance tips, you can help extend the life of your alternator and ensure your vehicle’s electrical system operates smoothly.
Conclusion: Enjoy Your Ride!
Replacing your car’s alternator is a significant accomplishment, and with the steps outlined in this guide, you’re now equipped to tackle this essential charging system fix. By following these instructions, you’ve not only saved money on repair costs but also gained valuable experience in DIY car maintenance.
Key Takeaways
You’ve learned how to identify the signs of a failing alternator, gather the necessary tools and supplies, and safely replace the alternator. These skills will serve you well in future DIY projects, including other car repairs and maintenance tasks.
Building DIY Confidence
Completing this project will give you the confidence to take on more complex car repairs, such as replacing other worn-out parts or performing routine maintenance tasks. With practice, you’ll become more comfortable with DIY repairs, and tasks like replacing a car alternator will become second nature.
Continue Learning and Growing
As you continue to work on your vehicle, you’ll develop a deeper understanding of its mechanics and be better equipped to diagnose and fix problems. Consider exploring other DIY guides and tutorials to further expand your skills and knowledge, and don’t be afraid to replace other parts or try new repairs, like fixing other components of your car’s charging system.


