
")


Replacing your vehicle’s door handles can be a straightforward DIY project if you have the right guidance. With a bit of patience and the correct tools, you’ll be able to fix your car’s door issues quickly and affordably.
This comprehensive guide will walk you through the process, ensuring you can enjoy functional door handles in no time. By following these steps, you’ll be able to replace your car’s door handle with ease.
Key Takeaways
- Learn how to replace your car’s door handle with a simple DIY project.
- Understand the tools and materials needed for the replacement.
- Follow a step-by-step guide to ensure a successful DIY car door handle replacement.
- Save time and money by doing it yourself.
- Enjoy functional car door handles with minimal effort.
Understanding the Importance of Functioning Door Handles
Door handles play a vital role in ensuring that your car is both accessible and secure. They are a fundamental aspect of your vehicle’s design, providing a convenient and safe way to enter and exit your car. Moreover, door handles are a critical component of your vehicle’s security features, as they are directly linked to the locking mechanism.
Why Door Handles Matter for Your Car
Functioning door handles are essential for the overall usability of your vehicle. They allow you to easily open and close your doors, which is particularly important in various weather conditions or when you’re in a hurry. Moreover, door handles that are in good condition contribute to the overall aesthetic appeal of your car, maintaining its value and your pride in ownership.
From a safety perspective, door handles that are worn out or broken can pose a risk. For instance, a door that doesn’t open or close properly can lead to accidents or injuries. Furthermore, a faulty door handle can compromise the security of your vehicle, making it easier for potential thieves to gain access.
Common Issues with Car Door Handles
Over time, car door handles can experience wear and tear, leading to various issues. Some common problems include handles becoming loose, breaking, or failing to operate smoothly. These issues can be due to mechanical failure, wear and tear, or even exposure to harsh weather conditions.
| Issue | Cause | Impact |
|---|---|---|
| Loose Door Handle | Wear and tear, loose screws | Difficulty opening or closing the door |
| Broken Door Handle | Mechanical failure, excessive force | Inability to open or close the door |
| Stiff Door Handle | Lack of lubrication, debris accumulation | Inconvenience, potential safety risk |
Understanding these common issues is the first step towards addressing them. By recognizing the causes and impacts of faulty door handles, you can take proactive measures to maintain or replace them as needed, ensuring your vehicle remains safe, secure, and convenient to use.
Tools and Materials Needed for Replacement
Before diving into the replacement process, it’s crucial to gather all the necessary tools and materials. This preparation will ensure a smooth and efficient installation of your new car door handle.
Essential Tools for the Job
To replace your car door handle, you’ll need a set of basic tools. These typically include:
- A screwdriver set (both Phillips and flathead)
- Pliers (for gripping small parts)
- A trim removal tool (to safely remove interior panels)
- A Torx driver (depending on your car’s make and model)
Having these tools on hand will make the process easier and help prevent damage to your car’s interior.
Recommended Replacement Handles
Choosing the right replacement handle is crucial for a successful installation. Ensure that the new handle matches your car’s make, model, and year. You can find replacement handles at auto parts stores or online retailers.
When selecting a replacement handle, consider the following factors:
- Compatibility with your vehicle’s specifications
- Material and build quality
- Price and warranty offered

Here’s a comparison table to help you understand the differences between OEM and aftermarket door handles:
| Feature | OEM Door Handles | Aftermarket Door Handles |
|---|---|---|
| Quality | High, exact match to original | Varies, can be high or lower quality |
| Price | Generally more expensive | Often less expensive |
| Warranty | Typically comes with a manufacturer’s warranty | Warranty varies by manufacturer |
Safety First: Preparing Your Workspace
To avoid accidents and ensure a smooth process, preparing your workspace is a critical preliminary step in the car door handle replacement process. This involves more than just having the right tools; it’s about creating a safe environment where you can focus on the task at hand.
Setting Up Your Work Area
Start by clearing the area around your vehicle of any clutter or obstructions. This will give you ample space to move around and access the door handle without any hindrances. Ensure your workspace is well-lit, as good lighting is crucial for car door handle removal and fixing car door handle tasks.
Organize your tools and materials within easy reach to minimize the risk of accidents caused by stretching or bending. A tidy workspace not only enhances safety but also improves efficiency, making the overall process less daunting.

Safety Gear to Consider
Wearing the right safety gear is essential when working on your vehicle. Gloves will protect your hands from cuts and abrasions, while safety glasses will shield your eyes from debris or chemical splashes. Additionally, consider wearing a dust mask if you’re working with materials that generate dust or particles.
By prioritizing your safety and preparing your workspace adequately, you’ll be better equipped to handle the task of replacing your car’s door handle. This proactive approach minimizes risks and ensures a successful outcome for your DIY project.
Steps to Remove the Old Door Handle
Removing the old car door handle is a crucial step in the replacement process. It involves accessing the door panel and detaching the handle from its mounting points. This process requires care to avoid damaging the door or the handle itself.
Accessing the Door Panel
To access the door panel, you’ll first need to remove the screws or clips holding it in place. These are typically found around the edges of the panel. Use a screwdriver or a trim removal tool to gently pry the panel away from the door. Be cautious not to damage the clips or the panel.
- Remove screws or clips around the door panel edges.
- Gently pry the panel away using a suitable tool.
- Disconnect any wiring connected to the door handle or other components.

Detaching the Old Handle
Once the door panel is removed, you’ll have access to the door handle’s mounting points. To detach the old handle, follow these steps:
- Identify the mounting screws or bolts holding the handle in place.
- Use the appropriate tool to remove these screws or bolts.
- Carefully pull the handle away from its mounting points.
Tip: Take your time when detaching the old handle to avoid stripping any screws or damaging the surrounding area.
By following these steps, you’ll be able to successfully remove the old car door handle, making way for the installation of the new one.
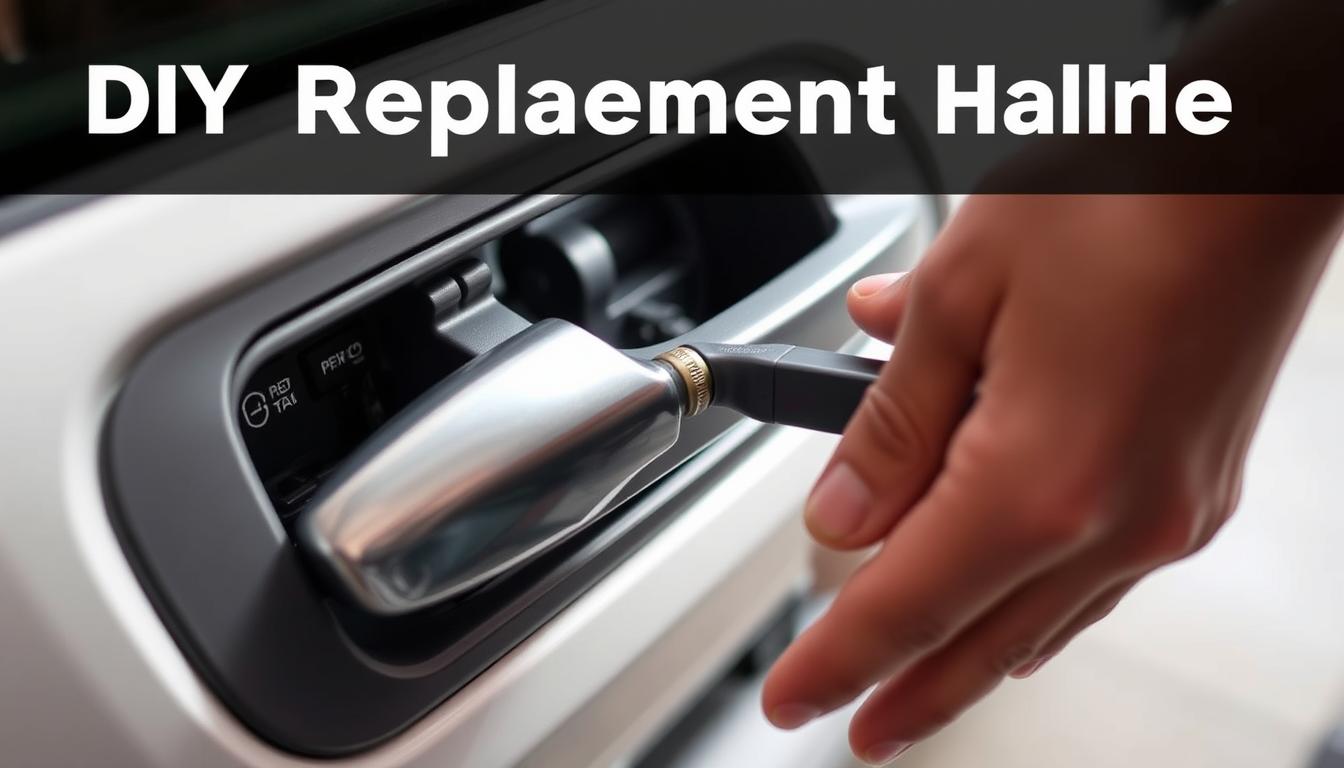
How to Install the New Door Handle
After successfully removing the old door handle, you can proceed to install the new one, ensuring a smooth operation. This step is crucial for the overall functionality of your car’s door.
Aligning the New Handle Properly
To align the new handle properly, start by comparing it with the old one to understand how it fits into place. Carefully examine the mounting points and ensure that the new handle is positioned correctly. It’s essential to follow the manufacturer’s instructions for specific guidance on alignment.
Take your time to adjust the handle as needed until it fits snugly into its designated space. Misalignment can lead to issues with the door’s operation, so precision is key.

Securing the Handle in Place
Once the new handle is aligned, the next step is to secure it in place. Use the screws or clips provided with the new handle, following the manufacturer’s instructions for the correct tightening sequence.
Ensure that the handle is firmly secured to prevent any loose parts or rattling noises. Double-check that all mounting points are tightened appropriately to avoid any future issues.
By following these steps, you can successfully install a new door handle, enhancing your car’s functionality and appearance.
Reattaching the Door Panel
With the new door handle installed, it’s time to reattach the door panel, a crucial step in completing the replacement process. This step requires attention to detail to ensure that all components are securely fastened, preventing any future issues with your car’s door.
Steps for Proper Reassembly
To reattach the door panel correctly, follow these steps:
- Align the door panel with the door frame, ensuring that all clips are properly positioned.
- Gently push the panel towards the door until the clips snap into place.
- Replace any screws or bolts that were removed during the disassembly process.
- Tighten the screws securely, but avoid overtightening, which can damage the panel or strip the screws.
| Step | Description | Tips |
|---|---|---|
| 1 | Align the door panel | Ensure all clips are aligned with the door frame |
| 2 | Push the panel into place | Gently push until the clips snap in |
| 3 | Replace screws or bolts | Tighten securely, avoid overtightening |
Testing the Handle Before Final Assembly
Before fully assembling everything, it’s essential to test the new door handle to ensure it’s working smoothly. Open and close the door several times to check for any issues. If the handle operates correctly, you can proceed with the final assembly.
Verify that: The handle opens and closes smoothly, and the door panel is securely attached.

By following these steps and testing the handle before final assembly, you can ensure a successful car door handle replacement and enjoy functional doors on your vehicle.
Troubleshooting Common Issues
Troubleshooting is a crucial step in ensuring your new door handle functions properly. Even after a successful replacement, some issues might arise, such as a handle that doesn’t open or close smoothly or a misaligned door panel. Addressing these problems promptly can save you time and frustration in the long run.
Handle Doesn’t Open or Close Smoothly
If your new door handle doesn’t operate smoothly, it could be due to improper alignment or insufficient lubrication. Check the alignment of the handle and ensure it’s properly secured. Applying a silicone-based lubricant to the moving parts can also help.
- Inspect the handle’s connection to the latch mechanism.
- Verify that the latch is properly aligned with the door frame.
- Lubricate the hinge pins and latch.
Misaligned Door Panel Concerns
A misaligned door panel can cause issues with the door handle’s operation. If the panel is not properly aligned, it can put additional stress on the handle, leading to premature wear. Reattach the door panel carefully, ensuring it’s aligned with the door frame.
| Issue | Cause | Solution |
|---|---|---|
| Handle doesn’t open or close smoothly | Improper alignment or lack of lubrication | Check alignment, lubricate moving parts |
| Misaligned door panel | Improper reattachment | Realign and reattach door panel |
By addressing these common issues, you can ensure your door handle operates smoothly and prolong its lifespan. Regular maintenance, such as lubricating the handle and checking its alignment, can prevent future problems.
Tips for Preventing Future Door Handle Problems
Preventing future door handle problems requires a proactive approach. By understanding the importance of maintenance and being aware of the signs of wear, you can significantly extend the life of your car’s door handles.
Regular Maintenance Advice
Regular maintenance is key to keeping your car’s door handles in good condition. This includes cleaning the handles regularly to prevent dirt and grime from building up and causing mechanical issues. Lubricating the moving parts with a suitable lubricant can also help to ensure that the handles operate smoothly.
Simple Maintenance Tasks:
- Clean door handles with a mild detergent and water.
- Lubricate moving parts every few months.
- Check for loose screws or bolts.
Signs of Wear to Watch Out For
Being able to identify the signs of wear on your car’s door handles can help you address potential issues before they become major problems. Some common signs include:
- Handles feeling loose or wobbly.
- Difficulty in opening or closing the door.
- Visible rust or corrosion.
By keeping an eye out for these signs and performing regular maintenance, you can help prevent future door handle problems.
| Maintenance Task | Frequency | Benefit |
|---|---|---|
| Cleaning | Weekly | Prevents dirt buildup |
| Lubrication | Every 3 months | Ensures smooth operation |
| Inspection | Monthly | Identifies signs of wear early |
When to Seek Professional Help
Understanding when to tackle car door handle replacement yourself and when to seek professional help can save time and money. While many car owners successfully replace their door handles on their own, certain situations may require the expertise of a professional mechanic.
Indicators That It’s Time to Call a Mechanic
If you encounter any of the following issues, it’s likely time to seek professional assistance:
- Complex door handle mechanisms that are difficult to navigate
- Damage to the door or surrounding areas that may complicate the replacement process
- Lack of experience with DIY car repairs
- Uncertainty about the correct replacement parts or tools
Professional mechanics have the training and experience to handle these complexities efficiently.
Cost Comparisons: DIY vs. Professional Repair
When deciding between DIY and professional repair, cost is a significant factor. Here’s a comparison:
| Aspect | DIY | Professional Repair |
|---|---|---|
| Parts Cost | $50-$200 | $50-$200 (often with a markup) |
| Labor Cost | $0 (your time) | $100-$300 |
| Total Cost | $50-$200 | $150-$500 |
While DIY can be cost-effective, the peace of mind and warranty offered by professional repairs can be worth the extra expense.
Frequently Asked Questions about Door Handle Replacement
Replacing a car door handle is often surrounded by questions, and this section aims to provide answers to some of the most common queries.
How Long Does the Replacement Take?
The time required to replace a car door handle can vary depending on your level of experience and the specific vehicle. Generally, it can take anywhere from 30 minutes to a few hours. If you’re familiar with DIY projects, you might complete the task more quickly.
Factors that can influence the time required include:
- The complexity of your car’s door handle mechanism
- Your familiarity with the tools needed
- The availability of the replacement handle
Can I Change the Handle Without Removing the Door Panel?
In some cases, it is possible to change the door handle without removing the door panel, but this largely depends on the car’s make and model. For many vehicles, accessing the handle’s mounting screws requires removing the door panel.
It’s essential to consult your car’s repair manual or online resources specific to your vehicle’s make and model to determine the best approach.
| Task | Time Required | Difficulty Level |
|---|---|---|
| Removing the old door handle | 15-30 minutes | Moderate |
| Installing the new door handle | 15-30 minutes | Moderate |
| Reattaching the door panel | 10-20 minutes | Easy |
Conclusion: Enjoying Your Functional Car Door Handles
Completing a DIY car door handle replacement project can be a significant achievement, giving you a sense of accomplishment and saving you money on repair costs. With your new handle installed, you can enjoy smooth operation and improved safety.
Checklist for a Successful Replacement
To ensure everything is in order, double-check that the new handle is securely fastened, the door panel is properly reattached, and all screws are tightened. Verify that the door opens and closes smoothly, and make any necessary adjustments.
Take on More DIY Projects
Now that you’ve successfully replaced your car door handle, consider tackling other DIY projects to further enhance your vehicle’s maintenance and repair skills. With practice, you’ll become more confident in your ability to replace car door handles and address other car-related tasks.
By following this DIY guide, you’ve not only replaced your car door handle but also gained valuable experience that can be applied to future car door handle replacement projects.


