
")


Maintaining your vehicle’s windshield washer system is crucial for clear visibility while driving. A faulty windshield washer nozzle can lead to reduced performance, making it difficult to clean your windshield effectively. Fortunately, replacing the nozzle yourself is a straightforward process that can save you money and enhance your DIY auto repair skills.
With the right tools and a bit of patience, you can have your windshield washer system functioning properly in no time. This guide will walk you through the simple steps involved in DIY windshield washer nozzle replacement, ensuring you can maintain your vehicle’s windshield washer system with confidence.
Key Takeaways
- Replacing the windshield washer nozzle is a simple DIY task.
- Having the right tools is essential for a successful replacement.
- This DIY project can save you money on auto repair costs.
- Enhance your car DIY maintenance skills with this guide.
- Ensure your windshield washer system functions properly after replacement.
Understanding Windshield Washer Nozzles
Understanding how windshield washer nozzles work is essential for their proper maintenance and replacement. Windshield washer nozzles are a critical part of your vehicle’s windshield washer system, responsible for directing washer fluid onto your windshield to maintain clear visibility while driving.
What is a Windshield Washer Nozzle?
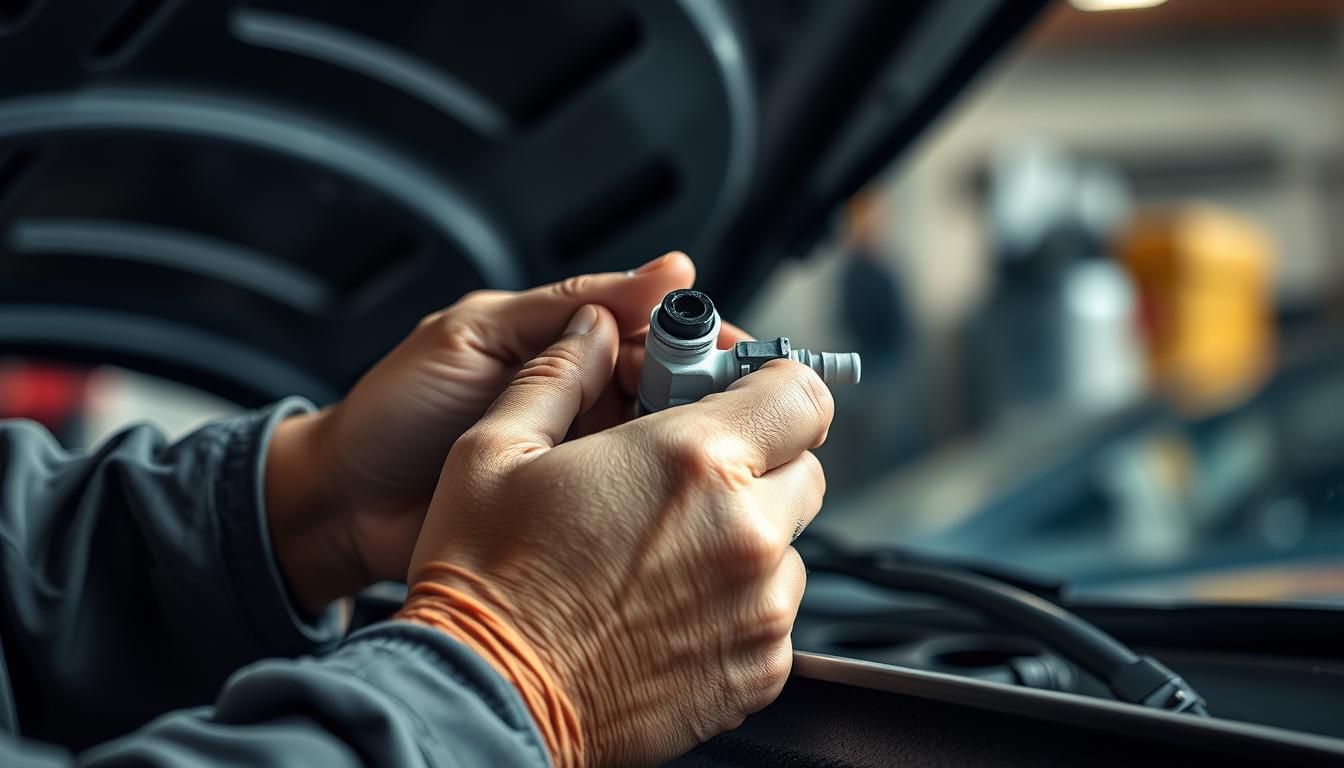
A windshield washer nozzle is a small device mounted on the hood or cowl of your vehicle, designed to spray washer fluid onto the windshield. These nozzles are typically adjustable, allowing you to direct the spray pattern to cover the desired area of the windshield.
Key features of windshield washer nozzles include:
- Adjustable spray patterns to customize coverage
- Durable design to withstand various weather conditions
- Compatibility with different types of washer fluids
How Does It Work?
The windshield washer nozzle operates by releasing washer fluid from a pressurized system. When you activate the windshield washer, the fluid is pumped from the reservoir through the hoses to the nozzles, which then spray the fluid onto the windshield.
The process involves:
- The washer fluid reservoir being filled with the appropriate washer fluid.
- The windshield washer pump creating pressure to push the fluid through the system.
- The fluid being directed through hoses to the windshield washer nozzles.
- The nozzles spraying the fluid onto the windshield in a predetermined pattern.
Common Problems with Nozzles
Windshield washer nozzles can encounter several issues, including clogging, misalignment, or damage. Clogging often occurs due to dirt or debris in the washer fluid, while misalignment can result from wear and tear or improper adjustment.
Common problems include:
- Clogged nozzles reducing spray effectiveness
- Misaligned nozzles failing to cover the correct area
- Damaged nozzles requiring replacement
Signs You Need to Replace Your Nozzle
Identifying the signs that your windshield washer nozzle needs replacement can save you from potential driving hazards. A malfunctioning nozzle can lead to reduced visibility, especially during rainy or snowy conditions. In this section, we’ll explore the common indicators that it’s time to replace your windshield washer nozzle.
Reduced Spray Coverage
If you notice that the spray pattern from your windshield washer nozzle is not covering the entire windshield, it might be time for a replacement. Reduced spray coverage can lead to inadequate cleaning, particularly during heavy rain or when the windshield is covered in dirt and debris.

Clogged or Blocked Nozzles
Clogged or blocked nozzles are another common issue that necessitates replacement. Dirt, debris, or even frozen washer fluid can clog the nozzles, preventing them from functioning correctly. If cleaning the nozzles doesn’t resolve the issue, it’s likely time to replace them.
Leaking Fluid
Leaking fluid is a clear indication that your windshield washer nozzle is compromised. Not only can this lead to a mess, but it also means that your washer system is not functioning as intended. Inspect your nozzles for any signs of leakage, and consider replacing them as part of your car maintenance hacks to keep your vehicle in top condition.
| Signs | Description | Action Required |
|---|---|---|
| Reduced Spray Coverage | Inadequate cleaning of the windshield | Inspect and replace nozzle |
| Clogged or Blocked Nozzles | Nozzles blocked by dirt or debris | Clean or replace nozzles |
| Leaking Fluid | Visible leaks around the nozzle area | Replace nozzle to prevent further leakage |
Tools Required for Replacement
The key to a hassle-free DIY windshield washer nozzle replacement lies in having the correct tools at your disposal. Ensuring you have everything needed before starting the project will save time and reduce frustration.
Basic Tools Needed
To replace your windshield washer nozzle, you’ll need a few basic tools. These include:
- A screwdriver (usually a Phillips head)
- Pliers or a wrench for removing any retaining clips
- A replacement nozzle compatible with your vehicle’s make and model
Having these tools on hand will allow you to complete the replacement efficiently.
Optional Tools for Convenience
While not necessary, some additional tools can make the replacement process easier. These may include:
| Tool | Benefit |
|---|---|
| Tweezers | For handling small parts or clips |
| Work light or flashlight | To illuminate the work area, especially in tight spaces |
| Socket set | For accessing nozzles located in hard-to-reach areas |
Using these optional tools can enhance your DIY experience by providing more convenience and potentially reducing the time required for the task.
“Having the right tools for the job makes all the difference in DIY projects. It’s not just about getting the job done, but doing it efficiently and safely.”
By being prepared with the necessary tools, you’ll be well on your way to successfully replacing your windshield washer nozzle and ensuring clear vision on the road.
Selecting the Right Replacement Nozzle
When it comes to replacing your windshield washer nozzle, selecting the right one is crucial for optimal performance. A suitable replacement nozzle ensures that your windshield washer system functions effectively, providing you with clear visibility while driving.
OEM vs Aftermarket Options
One of the primary decisions you’ll need to make when selecting a replacement nozzle is whether to opt for an Original Equipment Manufacturer (OEM) part or an aftermarket alternative.
- OEM Nozzles: These are made by the same manufacturer that produced the original nozzle for your vehicle. OEM nozzles guarantee a precise fit and maintain the original performance standards. However, they can be more expensive.
- Aftermarket Nozzles: These are produced by third-party manufacturers and can offer a more affordable alternative to OEM parts. While some aftermarket nozzles may not fit as perfectly or perform as well as OEM nozzles, many are of high quality and can be a cost-effective solution.

Factors to Consider When Choosing
Regardless of whether you choose an OEM or aftermarket nozzle, there are several factors to consider to ensure you select the right one for your vehicle.
- Compatibility: Ensure the nozzle is compatible with your vehicle’s make and model.
- Quality: Look for nozzles made from durable materials that can withstand various weather conditions.
- Spray Pattern: Consider the type of spray pattern you need. Some nozzles offer adjustable patterns, which can be beneficial.
- Price: Balance your budget with the quality and features you need.
By carefully considering these factors and understanding the differences between OEM and aftermarket options, you can make an informed decision that meets your needs and ensures a successful DIY windshield washer nozzle replacement.
Preparing for the Replacement
To ensure a smooth DIY experience, taking the right precautions and gathering your materials is essential. Replacing your windshield washer nozzle is a task that requires some basic knowledge and preparation.
Safety First: Essential Precautions
Before starting any DIY project, safety should be your top priority. When replacing your windshield washer nozzle, make sure your car is parked on a level surface and apply the parking brake. It’s also a good idea to consult your car’s manual for any specific instructions related to the windshield washer system.
Key safety precautions include:
- Ensuring the engine is turned off and cool
- Protecting your eyes with safety glasses
- Using gloves to prevent injury from sharp edges
As emphasized by automotive experts, “Safety is not just a precaution, it’s a habit.”
“The moment you drive over a pothole or hit a curb, your windshield washer nozzles can become misaligned or damaged.” –
Gathering Your Materials
Having the right tools and materials on hand will make the replacement process much easier. Here’s a list of what you’ll typically need:
| Tool/Material | Description |
|---|---|
| New Windshield Washer Nozzle | Ensure it’s compatible with your vehicle’s make and model |
| Screwdriver | Usually a Phillips head screwdriver is required |
| Pliers | For removing clips or other fasteners |
By following these steps and gathering the necessary materials, you’ll be well-prepared to replace your windshield washer nozzle efficiently and safely.
Removing the Old Washer Nozzle
Now that you’re prepared, let’s dive into the steps to remove the old washer nozzle. This process involves a few straightforward steps that will have you ready to install the new nozzle in no time.
Disconnecting the Fluid Line
The first step in removing the old washer nozzle is to disconnect the fluid line. This is a crucial step to prevent any spills or messes during the replacement process. To do this, you’ll need to locate the fluid line connected to the nozzle. Gently squeeze the collet on the fluid line to release the pressure, then pull the line off the nozzle. Be prepared to catch any remaining fluid in the line with a cloth or paper towel.

Removing Snap Clips or Screws
With the fluid line disconnected, the next step is to remove the snap clips or screws holding the nozzle in place. Inspect the nozzle carefully to determine whether it’s held by clips or screws. For nozzles secured with snap clips, simply push the clip away from the nozzle and gently pull the nozzle out. If your nozzle is secured with screws, use a screwdriver to remove them, then carefully extract the nozzle.
Once the old nozzle is removed, you’ll be ready to proceed with installing the new one. Make sure to keep the area clean and free of debris to ensure a smooth installation process.
Installing the New Washer Nozzle
With the old nozzle removed, you’re now ready to install the new one, ensuring your windshield washer system is functioning properly. This step is crucial for maintaining clear visibility while driving.
Attaching the New Nozzle
To attach the new nozzle, align it with the mounting hole on your vehicle’s hood or windshield washer arm. Ensure it’s securely fastened to prevent it from coming loose while driving. If your new nozzle comes with snap clips, push it into place until you hear a click. For screw-in nozzles, gently screw it in until it’s snug.
Reconnecting the Fluid Line
Once the new nozzle is attached, reconnect the fluid line. Make sure the connection is secure to avoid leaks. If your vehicle uses a quick-connect fitting, you’ll hear a click when it’s properly connected. For other types, ensure the hose is pushed onto the nozzle barb and secured with a clip if provided.
| Nozzle Type | Attachment Method | Fluid Line Connection |
|---|---|---|
| Snap-in Nozzle | Push into place until click | Quick-connect or hose barb |
| Screw-in Nozzle | Screw in until snug | Hose barb with clip |
Following these washer nozzle installation tips will help you complete the task efficiently. Remember, a well-installed washer nozzle is key to safe driving, as it ensures your windshield is cleaned effectively.
By completing this task, you’re not only enhancing your vehicle’s maintenance but also contributing to your safety on the road. This DIY car maintenance task is a simple yet effective way to ensure your vehicle remains in good condition.
Testing Your New Washer Nozzle
Now that you’ve installed the new washer nozzle, let’s put it to the test. Testing is a crucial step to ensure that your new nozzle is working correctly and that there are no issues with the installation.
Checking for Leaks
The first thing to check is whether there are any leaks around the newly installed nozzle. To do this, turn on your windshield washer system and inspect the area around the nozzle for any signs of leakage. Make sure to check the connections and the nozzle itself. If you notice any fluid leaking, you may need to tighten the connections or replace the nozzle if it’s damaged.

Ensuring Proper Spray Pattern
Next, you’ll want to ensure that the nozzle is spraying fluid onto the windshield correctly. Turn on the washer system and observe the spray pattern. The fluid should spray evenly onto the windshield, covering the area in front of your driver and passenger. If the spray pattern is off or the nozzle is clogged, you may need to clean or replace it. A proper spray pattern is crucial for maintaining clear visibility while driving.
As
“A well-maintained windshield washer system is key to safe driving.”
Ensuring your new nozzle is working correctly is a significant step in maintaining your vehicle’s overall safety and performance.
By following these steps, you can confidently test your new washer nozzle and ensure it’s working as expected. This simple DIY task can save you money and give you the satisfaction of maintaining your vehicle yourself.
Troubleshooting Installation Issues
Troubleshooting is a crucial step in ensuring your windshield washer nozzle functions correctly after installation. Even with a precise replacement process, some issues might still arise, affecting the performance of your windshield washer system.
Nozzle Not Spraying Properly
If the nozzle is not spraying properly, there could be a few reasons behind this issue. First, check if the nozzle is clogged. Debris or dirt might be blocking the nozzle’s outlet. Cleaning the nozzle with a soft brush or compressed air can often resolve this problem. Additionally, ensure that the fluid line is properly connected and not kinked, as this can restrict fluid flow.
Tips for resolving spraying issues:
- Check the nozzle for blockages.
- Clean the nozzle gently.
- Inspect the fluid line for kinks or disconnections.
Leaks After Installation
Leaks after installation can lead to a messy and inefficient windshield washer system. To address leaks, first inspect the connections between the nozzle and the fluid line. Ensure that these connections are secure and not damaged. If the leak persists, check the nozzle’s mounting for any signs of damage or misalignment.
Steps to fix leaks:
- Tighten any loose connections.
- Inspect the fluid line for damage.
- Check the nozzle’s mounting for proper alignment.
By following these troubleshooting steps, you can identify and fix common issues related to windshield washer nozzle installation, ensuring your system operates effectively.
Maintaining Your Windshield Washer System
To keep your windshield washer system functioning effectively, regular maintenance is essential. A well-maintained system ensures that your windshield remains clean and clear, providing you with optimal visibility while driving.
Regular Cleaning Tips
Cleaning your windshield washer nozzles regularly can prevent clogs and ensure a proper spray pattern. Here’s how you can do it:
- Use a small pin or needle to clear any debris from the nozzle openings.
- Soak the nozzles in a mixture of water and vinegar to remove any mineral deposits.
- Use compressed air to blow out any remaining dirt or debris.
Regular cleaning not only improves the performance of your washer system but also prolongs the life of your nozzles.

When to Inspect Your Nozzles
Regular inspection of your windshield washer nozzles is crucial to identify any potential issues before they become major problems. You should inspect your nozzles:
- Every 6 months as part of your regular vehicle maintenance routine.
- If you notice a decrease in spray coverage or pressure.
- After using a new batch of washer fluid, especially if it’s a different brand or type.
| Inspection Interval | Actions to Take |
|---|---|
| Every 6 months | Check for clogs, clean nozzles, and ensure proper spray pattern. |
| Upon noticing decreased performance | Inspect for blockages, clean or replace nozzles as needed. |
| After changing washer fluid | Check nozzles for any signs of clogging or damage. |
By following these simple maintenance tips, you can ensure that your windshield washer system continues to function effectively, providing you with a clear and safe driving experience.
Advantages of DIY Replacement
DIY replacement of your windshield washer nozzle is not only cost-effective but also a great learning opportunity. By taking on this task yourself, you can save money on labor costs and gain hands-on experience with car maintenance.
Cost Savings
One of the most significant advantages of DIY replacement is the potential for cost savings. By doing the job yourself, you avoid labor costs associated with taking your vehicle to a professional mechanic. The table below illustrates the potential savings:
| Service | Professional Cost | DIY Cost |
|---|---|---|
| Washer Nozzle Replacement | $50-$100 | $10-$30 |
| Labor Cost | $30-$70 | $0 |
| Total Cost | $80-$170 | $10-$30 |
As shown, the savings can be substantial, making DIY a financially attractive option for those comfortable with basic car repairs.
Skill Development
Engaging in DIY auto repair activities like replacing your windshield washer nozzle helps develop your mechanical skills. This hands-on experience can be invaluable for future car maintenance tasks, making you more self-sufficient and confident in your ability to handle minor repairs.
Moreover, the process of troubleshooting and fixing issues yourself enhances your problem-solving skills, which can be applied to other areas beyond car maintenance.
Frequently Asked Questions
Many car owners have questions about replacing their windshield washer nozzles, and we’re here to provide answers. Replacing your windshield washer nozzle is a relatively simple process, but it’s natural to have some questions before you start.
How Long Does This Replacement Take?
The time it takes to replace a windshield washer nozzle can vary depending on your level of comfort with DIY car maintenance and the specific vehicle you’re working on. On average, this task should take about 15 to 30 minutes per nozzle. This timeframe includes removing the old nozzle, inspecting the area, and installing the new one.
Can I Replace Just One Nozzle?
Yes, you can replace just one nozzle if that’s the only one that’s faulty. However, it’s worth considering replacing both nozzles at the same time for a couple of reasons:
- Consistency: Replacing both nozzles ensures that your windshield washer system operates consistently across your windshield.
- Future Maintenance: If one nozzle has failed, the other might be nearing the end of its lifespan. Replacing both at once can save you time and effort in the near future.
If you’re unsure about any aspect of the replacement process, it’s always a good idea to consult your vehicle’s owner’s manual or seek advice from a professional mechanic.
By addressing these common questions, we hope to have provided you with the confidence to tackle your DIY windshield washer nozzle replacement project. Remember, maintaining your vehicle’s windshield washer system is an important part of overall DIY car maintenance.
Additional Resources
To further assist you in mastering the DIY windshield washer nozzle replacement, we’ve curated some extra resources that can enhance your learning experience and provide additional guidance.
Video Tutorials
Video tutorials can be a fantastic way to visualize the steps involved in replacing your windshield washer nozzle. They often provide a clearer understanding of the process and can be particularly helpful for visual learners.
- YouTube Tutorials: Websites like YouTube have numerous DIY guides, including windshield washer nozzle replacement. You can search for videos specific to your car’s make and model.
- Manufacturer’s Guides: Sometimes, the car manufacturer’s website or YouTube channel will have official tutorials. These can be very reliable sources of information.
Helpful Blog Posts
In addition to video tutorials, there are many informative blog posts that can offer valuable insights and tips on car maintenance and DIY projects.
| Resource | Description |
|---|---|
| Car Maintenance Blogs | Websites dedicated to car maintenance often have detailed guides on various DIY projects, including windshield washer nozzle replacement. |
| DIY Forums | Online forums where car enthusiasts share their experiences and advice can be a great resource. You can find discussions on troubleshooting and tips specific to your vehicle. |
“The best way to learn is by doing, and with the right resources, you can tackle even the most daunting DIY projects with confidence.”
By leveraging these additional resources, you can further your knowledge and skills in car maintenance, making you more self-sufficient and confident in your DIY abilities.
Conclusion: Enjoy Clear Vision on the Road!
With your new windshield washer nozzle installed and your system functioning properly, you can enjoy clear vision on the road. Completing this DIY auto repair task not only enhances your driving safety but also gives you the confidence to tackle future car maintenance tasks.
Replacing your windshield washer nozzle is a straightforward process that can be accomplished with basic tools. By following the steps outlined in this guide, you’ve successfully learned how to replace windshield washer nozzle, a valuable skill for any car owner.
Regular maintenance of your windshield washer system is crucial for optimal performance. Keep your nozzles clean, inspect them regularly, and replace them as needed to ensure clear visibility during your drives. With these simple DIY skills, you’ll be well-equipped to handle other basic car repairs, making you a more self-sufficient and savvy car owner.


