
")


Getting a flat tire can be frustrating, but knowing how to fix it yourself can be incredibly empowering. Not only does it save you time, but it also puts money back in your pocket.
Learning to fix a tire on your own is a valuable skill that every driver should have. With a little practice and the right guidance, you’ll be able to tackle this common issue with confidence. By taking matters into your own hands, you’ll become more self-sufficient and less reliant on professional mechanics for minor repairs.
Key Takeaways
- Learn the basics of self tire repair to save time and money.
- Understand the steps involved in fixing a flat tire.
- Gain confidence in your ability to perform minor vehicle repairs.
- Become more self-sufficient in maintaining your vehicle.
- Reduce your reliance on professional mechanics for simple fixes.
Understanding Flat Tires
Understanding the causes and signs of a flat tire can save you time and stress on the road. A flat tire can occur due to various reasons, and being aware of these causes can help you take preventive measures.

Common Causes of Flat Tires
Flat tires are often the result of punctures from sharp objects on the road, such as nails or glass. Tire wear and improper tire inflation are also significant contributors to flat tires. Regularly checking your tire pressure and tread depth can help mitigate these issues.
Other causes include tire damage from road hazards, valve stem damage, and tire bead damage. It’s essential to inspect your tires regularly for any signs of damage or wear.
Signs You Have a Flat Tire
Identifying a flat tire early can make a significant difference in how easily you can repair or replace it. Common signs include a sudden loss of air pressure, a hissing sound from the tire, or a noticeable change in the vehicle’s handling. If your vehicle pulls to one side or you feel vibrations while driving, it could indicate a flat tire.
As the
“The best way to ensure your safety on the road is to be aware of your vehicle’s condition and address any issues promptly.”
Regular checks can help you identify potential problems before they become major issues.
By understanding the causes and signs of a flat tire, you can take the necessary steps to prevent or address the issue, ensuring your safety on the road.
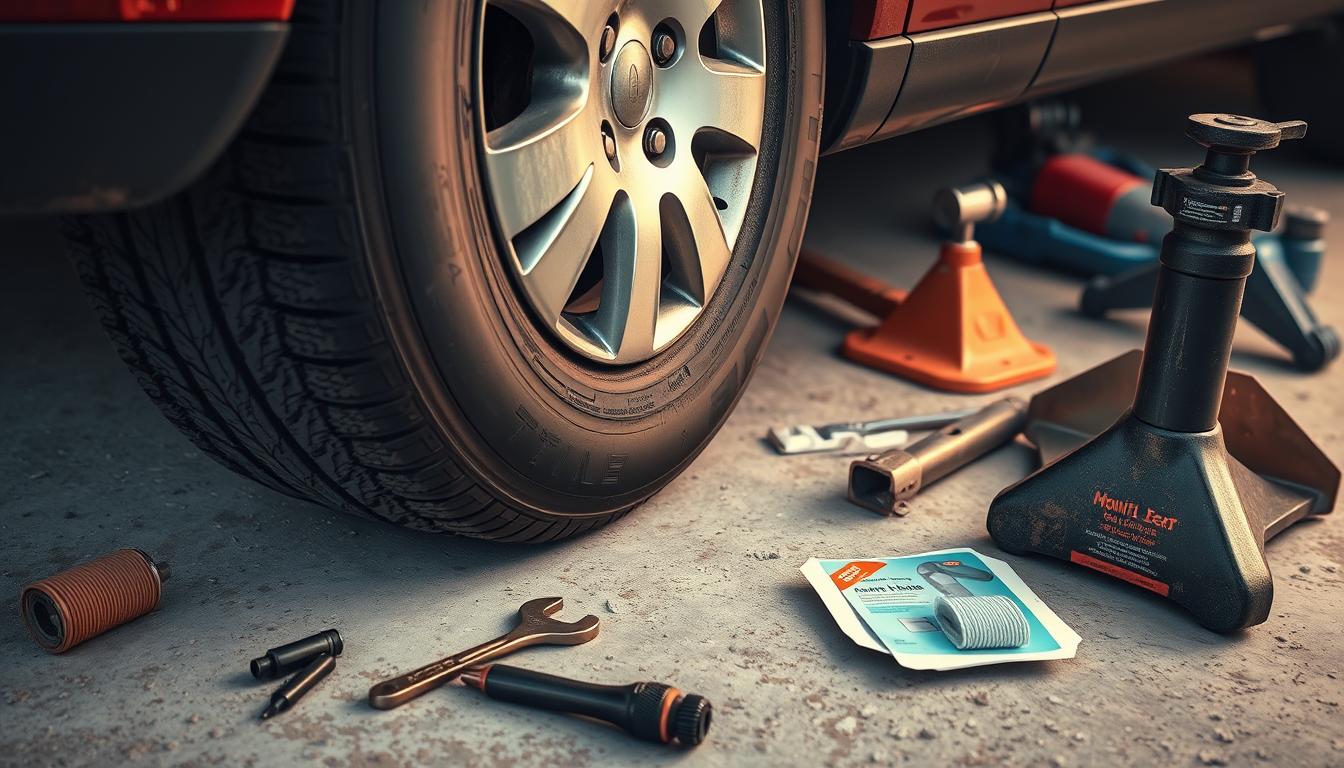
Essential Tools for DIY Flat Tire Repair
DIY tire maintenance requires a specific set of tools to ensure a safe and effective repair. Having the right equipment not only makes the process easier but also helps in achieving a professional-grade fix.
Tire Repair Kits
A tire repair kit is a must-have for any DIY tire repair. These kits usually include everything needed to fix a puncture, such as tire plugs, patches, and adhesive. A good quality tire repair kit can make all the difference in the success of your repair. When selecting a kit, look for one that includes a variety of plug sizes and a durable adhesive.

Safety Equipment
Safety should always be your top priority when working on your vehicle. Essential safety equipment includes gloves to protect your hands from cuts and abrasions, and safety glasses to shield your eyes from debris. Investing in good quality safety gear can prevent injuries and make the repair process safer. Additionally, consider wearing a reflective vest if you’re working in a low-light environment.
“Safety is not just a precaution, it’s a necessity when working with potentially hazardous materials and tools.”
Necessary Hand Tools
To effectively repair a flat tire, you’ll need a set of basic hand tools. A lug wrench is essential for loosening the lug nuts, while tire levers can help in removing the tire from the rim. Having the right hand tools can simplify the repair process and reduce the risk of damage to your tire or wheel. Other useful tools include a tire pressure gauge to ensure your tire is inflated to the correct pressure.
- Lug wrench
- Tire levers
- Tire pressure gauge
By having these essential tools on hand, you’ll be well-prepared to tackle a flat tire repair with confidence.
Evaluating the Damage
Evaluating the condition of your flat tire is essential for a successful DIY repair. Before you can fix the tire, you need to understand the extent of the damage.
Inspecting the Tire for Punctures
The first step in evaluating the damage is to inspect the tire for punctures. Carefully examine the tire’s surface for any signs of damage, such as nails, screws, or sharp objects that might have caused the flat tire. It’s also a good idea to check the tire’s sidewalls and tread for any signs of wear or damage.
Remove any debris that might be lodged in the tire, and take note of the puncture’s location and size. This information will be crucial in determining the best repair method.

Assessing the Condition of the Tire
After inspecting the tire for punctures, it’s essential to assess its overall condition. Check the tire’s tread depth and look for any signs of uneven wear. If the tire is worn down or damaged beyond repair, it may be more cost-effective to replace it.
Consider the tire’s age and overall condition. If it’s an older tire or has been damaged previously, it might be more prone to further flats or other issues. Consult your vehicle’s manual or speak with a professional if you’re unsure about the tire’s condition.
By carefully evaluating the damage and assessing the tire’s condition, you can make an informed decision about the best course of action for your flat tire repair. Whether you decide to repair or replace the tire, this step is crucial in ensuring your safety on the road.
Steps to Remove the Tire
The process of fixing a flat tire begins with safely removing the tire. This step is crucial for accessing the puncture and applying the necessary repairs.
Loosening the Lug Nuts
Before you jack up the vehicle, you need to loosen the lug nuts using a lug wrench. Turn the lug nuts counterclockwise until they are loose, but do not remove them yet. It’s essential to loosen them before lifting the vehicle to prevent the tire from rotating while you’re trying to loosen the lug nuts.
As advised by automotive experts, “loosening the lug nuts while the vehicle is still on the ground is a safety precaution that can prevent accidents.”
Lifting the Vehicle Safely
To lift the vehicle, position a car jack under the vehicle’s frame and raise it until the flat tire is off the ground. Ensure the jack is stable and sturdy before you start working under the vehicle. It’s also recommended to use jack stands for extra safety.

Once the vehicle is lifted, you can now completely remove the lug nuts and take off the flat tire. Remember to place the lug nuts in a safe location where they won’t get lost.
“Safety is not just a precaution, it’s a necessity when working under a lifted vehicle.”
By following these steps, you can safely remove the tire and proceed with the repair.
Repairing the Tire: The Plug Method
When it comes to fixing a punctured tire, the plug method is a popular choice among DIY enthusiasts. This method involves inserting a plug into the puncture to seal the tire, allowing it to hold air again.
Choosing the Right Plug
Selecting the appropriate plug is crucial for a successful repair. Tire repair plugs come in various sizes and materials. It’s essential to choose a plug that matches the size of the puncture.
The type of plug you need may depend on the tire’s construction and the location of the puncture. For most punctures, a standard rubber plug will suffice.

Inserting the Plug into the Puncture
To insert the plug, you’ll first need to prepare the puncture by cleaning it out with a reamer or a similar tool. This ensures the area is free from debris.
Next, you’ll insert the plug into the puncture using a plug insertion tool. Make sure the plug is seated properly to prevent air leaks.
After inserting the plug, trim the excess material and check the tire for any signs of air leakage.
Repairing the Tire: The Patch Method
The patch method is a crucial skill for any driver to master, offering a durable solution to tire punctures. This technique involves more than just slapping a patch on the tire; it requires careful preparation and application to ensure a lasting repair.
Preparing the Surface
Before applying a patch, the surface around the puncture must be properly prepared. This involves cleaning the area around the puncture to remove any debris or dirt that could interfere with the patch’s adhesion. Use a dedicated tire cleaning solution or a mixture of soap and water to clean the area thoroughly. After cleaning, dry the area completely with a clean cloth or let it air dry.
Next, use a tire buffing tool to roughen the surface around the puncture. This step is crucial as it helps the patch adhere better to the tire. Be sure to buff the area evenly and avoid applying too much pressure, which could damage the tire further.
Applying the Patch
Once the surface is prepared, it’s time to apply the patch. Start by selecting the right size of patch for your tire puncture. The patch should be large enough to cover the puncture entirely but not so large that it interferes with the tire’s sidewall or other parts of the tire.
Apply a thin layer of tire patching cement to the back of the patch and the area around the puncture on the tire. Allow the cement to become tacky before applying the patch. This usually takes a few minutes, depending on the cement’s brand and environmental conditions.
Carefully place the patch over the puncture, ensuring it’s centered and smooth out any air bubbles or wrinkles. Use a patch applicator or a similar tool to press the patch firmly onto the tire, ensuring good contact. Let the patch sit for the recommended time before inspecting the tire for any leaks.
By following these steps and using a high-quality flat tire patch kit, you can achieve a reliable and long-lasting tire repair. Remember, the key to a successful patch job is in the preparation and application.
When to Use a Tire Sealant
Tire sealants offer a temporary solution for flat tires, but knowing when to use them is crucial. A tire sealant can be particularly useful in emergency situations where a quick fix is needed to get back on the road.
Benefits of Tire Sealant
The primary benefit of using a tire sealant is its ability to provide a quick and easy fix for punctures. Tire sealants are especially useful for small punctures, allowing drivers to continue driving safely until they can get their tire properly repaired or replaced.
Another significant advantage of tire sealants is their ease of use. Most sealants come in a can that can be easily sprayed into the tire, making them a convenient option for emergency repairs. This can be a lifesaver for drivers who experience a flat tire in a remote area or at an inconvenient time.
Limitations of Tire Sealant
While tire sealants are useful, they have their limitations. They are not a permanent fix and are intended only to allow the vehicle to be driven safely until a proper repair can be made.
Additionally, tire sealants may not be compatible with all types of tires. For example, they may not work well with tire punctures that are too large or in certain types of tire constructions. It’s essential to read the instructions and understand the limitations of the sealant being used.
Understanding when to use a tire sealant and being aware of its benefits and limitations can help drivers make informed decisions about their tire repair needs.
Reinstalling the Tire
After successfully repairing your flat tire, the next crucial step is reinstalling it correctly to ensure your safety on the road. This process involves carefully positioning the tire back onto the wheel hub and securing it with the lug nuts.
Positioning the Tire Correctly
To start, align the tire with the wheel hub, ensuring that the valve stem is in the correct position, usually facing outward. Gently push the tire onto the hub until it is centered and secure. Make sure the tire is properly seated on the hub by checking that it is evenly aligned with the surrounding area.
Tightening the Lug Nuts
Tightening the lug nuts is a critical step that requires attention to detail. Begin by hand-tightening the lug nuts in a star pattern to ensure even pressure. This pattern involves tightening one lug nut, then moving to the next one in a star-shaped sequence. Once you’ve hand-tightened all lug nuts, use a lug wrench to tighten them further in the same star pattern.
It’s essential to check the owner’s manual for the recommended torque specification for your vehicle’s lug nuts. Over-tightening can damage the wheel or brake components, while under-tightening can lead to the wheel loosening over time.
After tightening the lug nuts, double-check that the tire is securely in place by giving it a few turns to ensure it’s properly seated and centered. Finally, lower your vehicle to the ground and perform a final check on the lug nuts’ tightness.
Checking Your Work
After completing the tire repair, it’s crucial to check your work to ensure the fix is safe and durable. This step is vital in DIY tire maintenance as it verifies that the repair can withstand the pressures of driving.
To begin checking your work, you’ll need to inspect the repair closely. This involves a visual examination to ensure that the plug or patch is properly seated and that there are no signs of further damage.
Inspecting the Repair
During the inspection, look for any signs of irregularities around the repaired area. Check that the plug is not protruding too much into the tire or if the patch is evenly applied without any air bubbles or wrinkles.
A table summarizing the key inspection points is provided below:
| Inspection Point | Acceptable Condition | Unacceptable Condition |
|---|---|---|
| Plug or Patch Alignment | Properly seated, not protruding excessively | Protruding, misaligned |
| Surface Condition | Smooth, even surface | Rough, uneven |
| Signs of Further Damage | No signs of further damage | Cracks, bulges, or other damage |
Testing for Air Leaks
After inspecting the repair visually, the next step is to test for air leaks. This can be done by applying soapy water to the repaired area and checking for bubbles, which indicate air escaping. The air leak test is a simple yet effective method to verify the integrity of the repair.
By following these steps, you can ensure that your tire repair is done correctly and safely, giving you confidence in your DIY tire maintenance skills.
Safety Tips for DIY Tire Repair
DIY tire repair can be hazardous if proper safety precautions are not taken. Ensuring your safety is crucial to successfully fixing a flat tire without professional help.
Using Protective Gear
One of the most effective ways to minimize risks during DIY tire repair is by using protective gear. This includes wearing gloves to protect your hands from cuts and abrasions, and safety glasses to safeguard your eyes from debris.
Additional protective gear such as a dust mask and steel-toed shoes can further enhance your safety. A dust mask can protect you from inhaling dust and debris, while steel-toed shoes can protect your feet from heavy objects.
Working in a Safe Environment
Creating a safe working environment is equally important. Ensure that your workspace is well-lit and stable. A well-lit area helps you see what you’re doing, reducing the chance of mistakes, while a stable surface prevents accidents caused by slipping or falling.
| Safety Measure | Benefit |
|---|---|
| Well-lit workspace | Reduces the chance of mistakes |
| Stable surface | Prevents accidents from slipping or falling |
| Protective gear | Protects against physical harm |
By combining protective gear with a safe working environment, you significantly reduce the risks associated with DIY tire repair. Always be mindful of your surroundings and take necessary precautions to ensure a safe and successful repair.
Knowing When to Seek Professional Help
While DIY flat tire repair can be a convenient and cost-effective solution, there are situations where seeking professional help is the best course of action. Understanding the limitations of DIY repairs is crucial to ensuring your safety on the road.
Extensive Tire Damage
If the tire damage is extensive, a DIY repair may not be enough. In such cases, a professional mechanic can assess the damage and recommend the necessary repairs or replacement. Tire damage can be a sign of a larger issue, such as misaligned wheels or worn-out suspension components.
Signs of Tire Damage Beyond a Simple Puncture
Some signs of tire damage require expert assessment, including cracks in the sidewall, bulges, or uneven wear patterns. If you notice any of these signs, it’s best to consult a professional mechanic who can provide a thorough inspection and recommend the necessary repairs.
Recognizing the limitations of DIY flat tire repair and knowing when to seek professional help can save you from further complications and ensure your safety on the road.


