
")


Repairing a cracked car bumper can seem daunting, but with the right guidance, it’s a task you can accomplish at home. Not only can DIY car bumper repair save you money, but it also gives you a sense of accomplishment.
Our comprehensive bumper repair guide will walk you through the necessary steps to restore your bumper to its original condition. With a bit of patience and the right tools, you can achieve professional-looking results without visiting a workshop.
Key Takeaways
- Assess the damage to determine the best repair approach.
- Gather the necessary tools and materials for the repair.
- Clean the area around the crack to ensure a proper fix.
- Apply a suitable adhesive or filler to repair the crack.
- Finish with a coat of paint to match the original color.
Understanding Car Bumper Components
Understanding what your car’s bumper is made of is essential for effective repair. Car bumpers are complex components that serve both functional and aesthetic purposes. Knowing the materials used in your bumper’s construction and its role in vehicle safety is crucial for choosing the right repair method.
What Are Bumpers Made Of?
Most modern bumpers are made from a variety of materials, including plastic, fiberglass, and aluminum. The choice of material depends on the vehicle’s make, model, and design specifications. For instance, plastic bumpers are common due to their flexibility and resistance to minor impacts. Fiberglass bumpers, on the other hand, are stronger and often used in high-performance vehicles. Understanding the specific material of your bumper is vital for selecting the appropriate repair techniques and materials.
Key materials used in bumper construction include:
- Plastic: Flexible and resistant to minor impacts.
- Fiberglass: Strong and often used in high-performance vehicles.
- Aluminum: Lightweight and corrosion-resistant.
The Function of Bumpers in Vehicles
Bumpers play a critical role in vehicle safety by absorbing impact during collisions, thereby protecting the vehicle’s body and other critical components. They are designed to withstand minor impacts without sustaining significant damage. In addition to their functional role, bumpers also contribute to the vehicle’s aesthetic appeal. A well-maintained bumper can enhance the overall appearance of your car, while a damaged bumper can detract from its look and potentially lead to more costly repairs if not addressed.
As “The primary function of a bumper is to absorb the energy of an impact, reducing the risk of damage to the vehicle’s body and other essential components.” This highlights the importance of bumpers in vehicle safety and the need for proper repair and maintenance.
Common Types of Bumper Damage
Car bumper damage can manifest in various forms, from minor scratches to deep cracks, each requiring a distinct repair approach. Understanding the type and severity of the damage is crucial for determining the best course of action in your DIY car bumper repair journey.

Cracks vs. Dents: What’s the Difference?
Cracks and dents are two common types of bumper damage, but they require different repair techniques. Cracks are fissures in the bumper material that can be superficial or deep, potentially compromising the structural integrity of the bumper. Dents, on the other hand, are depressions in the bumper surface caused by impacts. While dents can often be repaired through auto bumper repair tutorial-recommended methods like popping or sanding, cracks may necessitate more complex repairs involving adhesives or welding.
How to Identify Damage Severity
Assessing the severity of bumper damage is vital for deciding whether you can fix bumper scratches at home or if professional help is needed. To do this, inspect the damage closely. For cracks, check the depth and length; if the crack is deep or long, it may require more than a simple DIY fix. For dents, evaluate the size and location; larger dents or those in critical areas may need professional attention to ensure the bumper’s functionality and appearance are restored.
By understanding the nature of your bumper’s damage, you can choose the most appropriate repair method, ensuring a successful DIY car bumper repair experience.
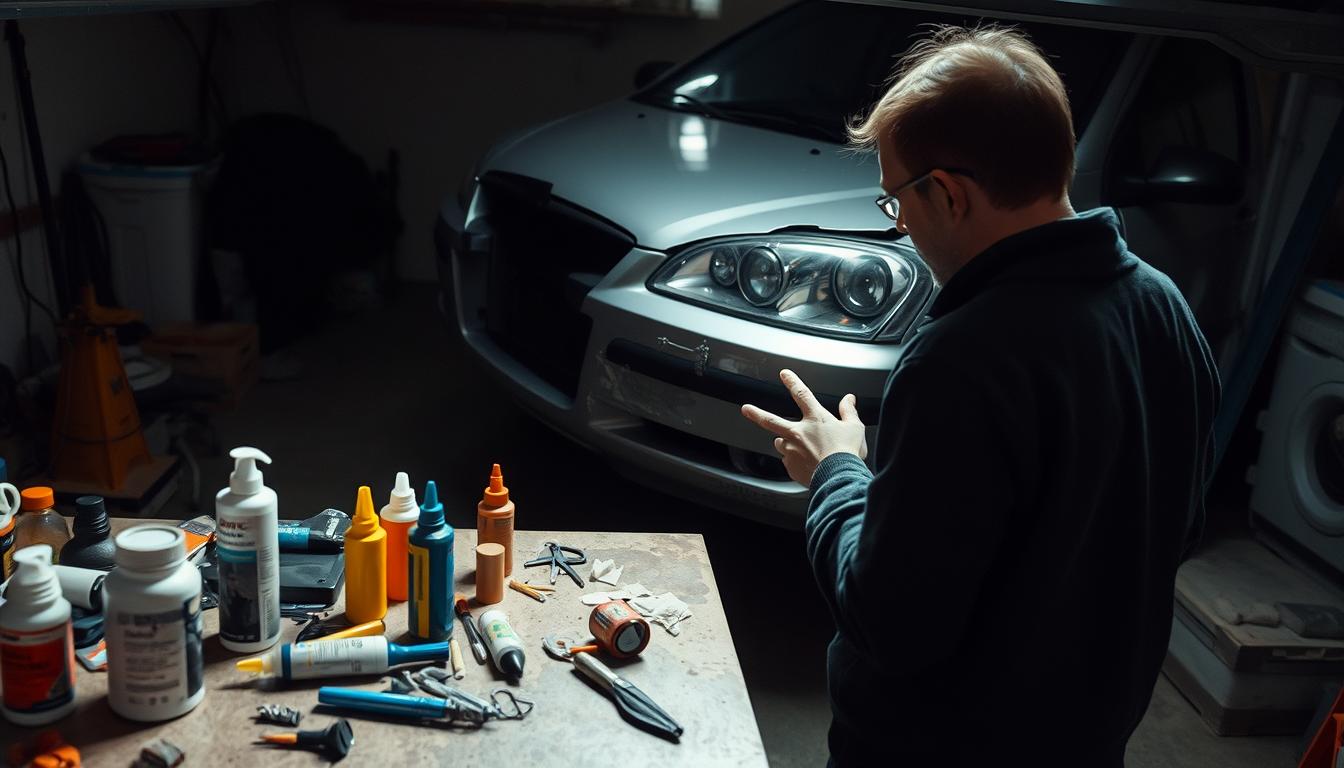
Preparing for the Repair Process
A successful DIY bumper repair starts with thorough preparation. Before you begin fixing your car bumper, it’s crucial to understand the steps involved and the materials you’ll need.
Gathering Necessary Tools and Materials
To fix your car bumper effectively, you’ll need to gather the right tools and materials. For a basic bumper repair guide, you’ll typically need:
- Epoxy or adhesive suitable for your bumper material
- Sandpaper of various grits
- Paint and primer if you’re planning to repaint the bumper
- Cleaning supplies like soap and water or a degreaser
- Safety gear including gloves and protective eyewear
Having these tools and materials on hand will make the at-home bumper fix process smoother and more efficient.
Finding a Good Work Area
Finding a suitable workspace is just as important as gathering your tools. For a DIY bumper restoration, you’ll need a well-ventilated area that is free from dust and debris. Ideally, work in a garage or a well-ventilated outdoor area. If you’re working indoors, ensure that the space is clean and well-ventilated to avoid inhaling fumes from adhesives or paint.
Additionally, having a clean and organized workspace will help you stay focused and avoid mistakes during the repair process.
Cleaning the Damaged Area
A thorough cleaning of the damaged bumper area is vital to ensure a durable and visually appealing repair. Dirt, grime, and wax can interfere with the repair process, leading to a poor finish. Therefore, it’s crucial to clean the area thoroughly before proceeding with the repair.
Importance of Cleaning Before Repairing
Cleaning the damaged area is not just about removing visible dirt; it’s about creating a surface that repair materials can bond to effectively. A clean surface ensures a strong bond between the bumper material and the repair compounds, which is essential for a durable repair.
As noted by a leading auto repair expert, “A clean surface is the foundation of a successful repair. It’s the difference between a fix that lasts and one that fails over time.”
“A clean surface is the foundation of a successful repair. It’s the difference between a fix that lasts and one that fails over time.”
Recommended Cleaning Supplies
To clean the damaged area effectively, you’ll need the right supplies. Here’s a list of what’s typically required:
- Mild detergent or soap
- Soft-bristled brush
- Clean water
- Microfiber cloths
- Optional: specialized cleaning products for automotive plastics or bumpers
| Cleaning Supply | Purpose |
|---|---|
| Mild Detergent or Soap | To clean the surface without damaging the material |
| Soft-bristled Brush | To gently scrub away dirt and grime |
| Clean Water | To rinse the soap off the bumper |
| Microfiber Cloths | To dry the area and prevent water spots |
For particularly stubborn grime, consider using a specialized automotive cleaning product. These products are designed to be safe on automotive materials while effectively removing dirt and grime.
By following these steps and using the right cleaning supplies, you’ll be able to prepare your car bumper for a successful repair. Remember, the key to a durable and visually appealing fix is in the preparation.
Assessing the Damage
Before diving into the repair process, it’s crucial to assess the extent of the damage to your car bumper. This step will help you determine whether you’re dealing with a minor crack that can be fixed at home or a more significant issue that requires professional attention.
When evaluating the damage, consider the size and location of the crack, as well as the material your bumper is made of. Modern car bumpers are typically made from plastic, fiberglass, or a combination of materials, each requiring different repair approaches. A thorough assessment will guide your decision on whether to proceed with a DIY repair or seek professional help.
How to Determine If You Can DIY
To decide if you can repair the bumper crack yourself, ask yourself a few questions:
- How large is the crack? Small cracks are generally easier to fix at home.
- What is the bumper made of? Different materials have different repair requirements.
- Do you have the necessary tools and materials? Having the right equipment is crucial for a successful DIY repair.
- Are you comfortable with DIY projects? Your level of comfort and experience with similar repairs can influence your decision.
If you’ve answered these questions and feel confident in your ability to repair the crack, you can proceed with a DIY fix. However, if you’re unsure or the damage is extensive, it’s best to seek professional help.
When to Seek Professional Help
There are situations where seeking professional help is the best course of action. If the crack is large, or the bumper is severely damaged, a professional can ensure a more durable and aesthetically pleasing repair. Additionally, if your bumper is made from a material you’re not familiar with, or if you’re not confident in your DIY skills, it’s wise to consult an expert.
“A professional repair service can provide a warranty on their work, giving you peace of mind that the repair will last.”
Ultimately, the decision to DIY or seek professional help depends on your assessment of the damage and your comfort level with the repair process.
Repairing Minor Cracks
Epoxy is a popular choice for repairing minor cracks in car bumpers due to its strong bonding capabilities. When dealing with minor cracks, it’s essential to follow a precise repair process to ensure a durable and visually appealing outcome.
Using Epoxy: Step-by-Step Instructions
To effectively use epoxy for DIY bumper restoration, follow these steps:
- Prepare the epoxy according to the manufacturer’s instructions, ensuring you mix the correct ratio of resin to hardener.
- Apply the mixed epoxy to the cracked area, using a putty knife or a similar tool to fill the crack completely.
- Allow the epoxy to cure for the recommended time, usually several hours or overnight, depending on the product.

Sanding and Smoothing the Repair
Once the epoxy is fully cured, the next step in our bumper repair guide is sanding and smoothing the repaired area. Start with coarse-grit sandpaper (about 120-grit) to remove any excess epoxy and to feather the edges so that the repair blends with the surrounding bumper material.
- Progressively move to finer grits (220-grit, then 320-grit) for a smoother finish.
- After sanding, clean the area thoroughly to remove any dust or debris.
- For an even smoother finish, consider using a rubbing compound or a polishing wheel.
By following these steps, you can effectively repair minor cracks in your car’s bumper, restoring its appearance and integrity. For more complex damage, it may be necessary to consult a professional or consider additional repair techniques as outlined in our subsequent sections on how to repair car bumper damage.
Fixing Larger Cracks
For significant bumper damage, techniques like fiberglass repair and plastic welding are invaluable. When the crack is too large, a more comprehensive approach is necessary to restore your bumper’s integrity.
The Fiberglass Repair Method
Fiberglass repair is a highly effective method for fixing larger cracks, especially in bumpers made from fiberglass. This technique involves applying fiberglass mat and resin to the damaged area to reinforce it.
- Clean the damaged area thoroughly to remove any debris.
- Apply a layer of resin to the crack, followed by a piece of fiberglass mat.
- Allow the resin to cure completely before sanding the area smooth.
Benefits of Fiberglass Repair:
| Benefit | Description |
|---|---|
| Strength | Significantly reinforces the damaged area |
| Durability | Provides a long-lasting repair |
| Versatility | Can be used on various types of bumper materials |
Using Plastic Welding Techniques
Plastic welding is another effective technique for repairing larger cracks, particularly in plastic bumpers. This method involves melting the plastic at the crack and fusing it together.
Key Steps in Plastic Welding:
- Prepare the area by cleaning it.
- Use a plastic welding rod to fill the crack.
- Apply heat using a heat gun to melt the rod and fuse it with the surrounding plastic.
- Sand the area to smooth out the repair.
By mastering these advanced techniques, you can effectively fix larger cracks in your car bumper, restoring its appearance and functionality. Whether you choose fiberglass repair or plastic welding, following the correct steps is crucial for a successful DIY car bumper repair.
Painting the Repaired Area
The final touch to your DIY bumper repair is applying a new coat of paint that matches your vehicle’s original hue. This step is crucial for achieving a professional-looking finish.
Choosing the Right Paint for Your Bumper
Selecting the correct paint for your bumper is vital. You need to consider the type of material your bumper is made of and the color code of your vehicle. Most modern bumpers are made from plastic or fiberglass, so you’ll need paint that adheres well to these materials.
Key Considerations:
- Material compatibility
- Color matching
- Finish type (matte, gloss, etc.)
To find your vehicle’s color code, you can check the manufacturer’s label, usually found on the driver’s side door jamb or under the hood. Once you have the color code, you can purchase the appropriate paint from an auto parts store or online.
| Paint Type | Characteristics | Suitable For |
|---|---|---|
| Acrylic Paint | Easy to apply, dries quickly | Most plastic bumpers |
| Urethane Paint | Durable, resistant to fading | High-end vehicles, fiberglass bumpers |
Techniques for a Smooth Finish
Achieving a smooth finish requires patience and the right technique. Start by applying a primer to ensure the paint adheres properly. Then, apply thin coats of paint, allowing each coat to dry before adding the next.
Tips for a Professional Finish:
- Use a high-quality paint sprayer for an even coat.
- Apply paint in a well-ventilated area, free from dust.
- Allow the paint to dry completely between coats.
As
“The key to a successful paint job is preparation and patience.”
, it’s essential to follow these steps carefully to achieve a professional-looking finish.

By following these guidelines and tips, you can achieve a beautifully painted bumper that looks like new, completing your DIY bumper restoration project.
Adding Protective Coating
After successfully repairing your car bumper, the next crucial step is to apply a protective coating. This final layer not only enhances the appearance of your bumper but also provides a robust defense against future damage.
Benefits of Protective Coatings
Protective coatings offer several benefits, including:
- Enhanced Durability: Protective coatings help to extend the life of your bumper repair by shielding it from environmental factors.
- Improved Appearance: A good protective coating can maintain the glossy finish of your bumper, keeping it looking newer for longer.
- Easy Maintenance: Coatings make cleaning easier by providing a barrier against dirt and grime.
According to a study by the automotive research group, applying a protective coating can reduce the need for future repairs by up to 30%. As one expert noted, “A protective coating is like insurance for your bumper repair. It may seem like an extra step, but it pays off in the long run.”
“A good protective coating is worth its weight in gold when it comes to maintaining your vehicle’s appearance and durability.”
Recommended Products for Longevity
When it comes to choosing a protective coating, there are several options available. Here are a few recommended products:
| Product | Description | Price Range |
|---|---|---|
| 3M Paint Protection Film | High-quality film that protects against scratches and UV damage | $100-$300 |
| Meguiar’s Hybrid Ceramic Spray Coating | Easy-to-apply coating that provides a hydrophobic layer | $20-$50 |
| Chemical Guys Carnauba Premium Spray Wax | Provides a protective layer with a glossy finish | $15-$30 |
When selecting a product, consider factors such as durability, ease of application, and price. It’s also worth reading reviews and watching tutorials to ensure you’re using the product correctly.
By applying a protective coating, you’re not only safeguarding your bumper repair but also making future maintenance easier. This step is crucial in ensuring that your DIY repair stands the test of time.
Reinstalling Any Removed Components
Reinstalling removed components is a crucial step in restoring your vehicle’s bumper to its original state. This process ensures that all parts fit together correctly and function as intended.
Steps to Reattach Bumper Parts
To reattach bumper parts, start by gathering all the components you removed during the repair. This may include license plate holders, sensors, or trim pieces. Ensure that all parts are clean and free of debris before reinstallation.
- Align each component with its corresponding mounting points on the bumper.
- Use the original screws, clips, or fasteners to secure the parts back into place.
- Tighten the fasteners firmly, but avoid over-tightening, which can damage the bumper or the components.
For components like sensors or license plate holders, refer to your vehicle’s manual for specific reinstallation instructions, as the process can vary between models.
Ensuring Proper Alignment
Proper alignment is key to a successful reinstallation. Misaligned parts can lead to functional issues or aesthetic problems. To ensure proper alignment:
- Double-check that all mounting points are clean and free of debris.
- Align the components with their respective positions, ensuring they fit snugly into their designated spaces.
- For parts like trim pieces, use a gentle pressing motion to secure them into place, ensuring they are evenly aligned with the surrounding areas.
A well-aligned reinstallation not only enhances the appearance of your vehicle but also ensures that all components function correctly.

| Component | Reinstallation Tips | Common Issues |
|---|---|---|
| License Plate Holder | Align with bumper holes, secure with original screws. | Misalignment, loose screws. |
| Sensors | Refer to vehicle manual, ensure wiring is intact. | Incorrect wiring, sensor malfunction. |
| Trim Pieces | Gently press into place, ensure even alignment. | Cracks, uneven spacing. |
By following these steps and tips, you can successfully reinstall the components you removed during your DIY car bumper repair, ensuring a professional-looking finish and proper functionality.
Safety Tips for DIY Bumper Repair
When embarking on a DIY bumper repair, safety should be your top priority to avoid accidents and ensure a successful outcome. Working on your car’s bumper involves various potentially hazardous materials and tools, making it crucial to be prepared.
Essential Safety Gear to Wear
Wearing the right safety gear is fundamental when undertaking a DIY bumper repair. This includes protective gloves to prevent cuts and abrasions, safety glasses to protect your eyes from debris, and a dust mask to avoid inhaling harmful particles when sanding or grinding. Additionally, wearing long sleeves and pants can provide extra protection against scratches and chemical splashes.
Common Hazards to Avoid
Several hazards are associated with DIY bumper repair, including chemical exposure from adhesives and paints, physical injury from tools, and the risk of fire from flammable materials. To mitigate these risks, it’s essential to work in a well-ventilated area, keep a fire extinguisher nearby, and follow the manufacturer’s instructions for all products used. Being mindful of these potential hazards and taking proactive steps to minimize them can significantly enhance your safety during the repair process.
By prioritizing safety and being aware of the potential hazards, you can ensure a successful and injury-free DIY bumper restoration experience. For more bumper repair tips and guidance on how to repair car bumper effectively, continue following the best practices outlined in this guide.
Troubleshooting Common Issues
Even with careful planning, DIY car bumper repairs can sometimes go awry. Whether you’re following an auto bumper repair tutorial or attempting to fix bumper scratches at home, it’s essential to know how to troubleshoot common problems that may arise during the process.
One of the most significant concerns is when the repair doesn’t turn out as expected. This can be due to various factors, including the severity of the damage or the materials used.
What to Do If the Repair Fails
If you find that your DIY car bumper repair isn’t holding up, don’t panic. The first step is to assess the situation and determine the cause of the failure. Was the damage more extensive than you initially thought? Did you use the wrong materials or techniques? Once you’ve identified the issue, you can decide on the best course of action.
In some cases, you may need to revisit your repair strategy and adjust your approach. This could involve using different materials or consulting additional resources, such as online forums or professional repair services.
“The key to successful troubleshooting is patience and persistence. Don’t be afraid to try again, and don’t hesitate to seek help when needed.” – Expert Auto Repair Technician
How to Hide Imperfections
If your repair is mostly successful but has some minor imperfections, there are ways to hide these flaws. One effective method is to use a high-quality touch-up paint that matches your vehicle’s original color. Applying a clear coat can also help to blend the repaired area with the surrounding surface.
For more significant imperfections, you may need to consider additional repair techniques or consult a professional for further assistance.
| Issue | Troubleshooting Tip |
|---|---|
| Repair not holding | Reassess damage severity and adjust repair strategy |
| Visible imperfections | Use touch-up paint and clear coat to blend the area |

By following these troubleshooting tips and being prepared for potential issues, you can successfully complete your DIY car bumper repair and enjoy a bumper that looks like new.
Cost Comparison: DIY vs. Professional Repairs
Understanding the cost implications of DIY versus professional bumper repairs is crucial for making an informed decision. When considering whether to fix a car bumper crack at home or have it done professionally, cost is a significant factor.
One of the main advantages of opting for a DIY repair is the potential for cost savings. Let’s break down the costs associated with a DIY bumper repair.
Breakdown of DIY Repair Costs
The cost of a DIY bumper repair can vary widely depending on the materials needed and the extent of the damage. Here are some typical expenses to consider:
- Epoxy or adhesive: $10-$30
- Sanding tools and materials: $20-$50
- Paint and primer: $50-$100
- Protective coating: $20-$50
On average, a DIY bumper repair kit can cost anywhere from $50 to $200, depending on the quality and brand of the materials.
| Material | Low Cost | High Cost |
|---|---|---|
| Epoxy/Adhesive | $10 | $30 |
| Sanding Tools/Materials | $20 | $50 |
| Paint/Primer | $50 | $100 |
| Protective Coating | $20 | $50 |
| Total | $100 | $230 |
When It’s Worth Hiring an Expert
While DIY repairs can be cost-effective, there are situations where hiring a professional is the better choice. If the damage is extensive, or you’re not confident in your ability to perform the repair, it’s worth considering professional help.
Professional bumper repairs can cost anywhere from $300 to $1,500 or more, depending on the extent of the damage and the make of the vehicle. While this may seem expensive, professionals can guarantee a high-quality finish and may offer warranties on their work.
In conclusion, while DIY bumper repairs can offer significant cost savings, it’s essential to weigh these against the potential benefits of hiring a professional. By considering the extent of the damage and your own capabilities, you can make an informed decision that suits your needs and budget.
Maintaining Your Bumper Post-Repair
To keep your car bumper in good condition after a repair, regular maintenance is essential. This not only extends the lifespan of the repair but also maintains the overall appearance of your vehicle.
Regular Checks for Damage
Regularly inspecting your bumper for any signs of damage is crucial. Look for cracks, dents, or scratches that could compromise the integrity of the bumper. Early detection allows for timely intervention, preventing minor issues from becoming major problems.
Inspect your bumper:
- After parking in tight spaces
- Following minor accidents or collisions
- During routine vehicle maintenance checks
Tips for Preventive Care
Preventive care is key to maintaining your bumper’s condition. Here are some tips to help you keep your bumper in top shape:
Use a mild soap and water solution to clean your bumper regularly. Avoid harsh chemicals that can damage the paint or material.
Avoid extreme temperatures when washing your car, as sudden changes can cause damage to the bumper material.
By following these tips and regularly checking for damage, you can ensure your bumper remains in good condition, maintaining the overall look and integrity of your vehicle.
Conclusion: The Benefits of DIY Car Bumper Repair
Repairing a car bumper crack at home can be a rewarding experience, offering numerous benefits beyond just fixing the damage. By taking on this DIY project, you not only save money on repair costs but also gain valuable hands-on experience and skills.
Valuable Skills and Cost Savings
Engaging in DIY car bumper repair allows you to develop a range of useful skills, from basic car maintenance to more complex repair techniques. With bumper repair tips and at-home bumper fix methods, you can tackle future repairs with confidence. This self-sufficiency can lead to significant cost savings, as you won’t need to rely on professional services for every minor repair.
Empowerment Through Knowledge
By mastering the art of DIY car bumper repair, you empower yourself with the knowledge to handle similar tasks in the future. This expertise can be applied to various aspects of car maintenance, making you more self-sufficient and confident in your ability to tackle repairs. Whether you’re dealing with a minor crack or a more significant bumper damage, the skills you’ve acquired will serve you well, making the at-home bumper fix a valuable skill to have.


