
")


Maintaining your vehicle’s performance doesn’t have to break the bank. Replacing your car’s fuel filter is a simple and cost-effective way to ensure your car runs smoothly. With the right tools and a bit of knowledge, you can save money on labor costs and gain a better understanding of your vehicle’s mechanics.
Our step-by-step guide will walk you through the process, making it easy to replace your car’s filter at home. By following our friendly guide, you’ll feel confident and comfortable with the task, and you’ll be able to keep your car in top condition.
Key Takeaways
- Replacing your car’s fuel filter is a simple and cost-effective maintenance task.
- With the right tools and knowledge, you can save money on labor costs.
- Our guide provides a step-by-step process to help you replace your car’s filter at home.
- Gaining hands-on experience with your vehicle’s mechanics can be beneficial.
- Regular maintenance can help keep your car running smoothly.
Understanding the Importance of a Fuel Filter
A fuel filter plays a vital role in maintaining your vehicle’s performance by ensuring that the fuel reaching your engine is clean and free from contaminants.
The fuel filter is a crucial component that directly affects your vehicle’s engine health and overall efficiency.
What Does a Fuel Filter Do?
The primary function of a fuel filter is to filter out dirt, rust, and other debris from the fuel before it reaches the engine. This process is essential for preventing damage to the engine’s fuel system and maintaining optimal vehicle performance.
By keeping the fuel clean, the fuel filter helps to:
- Improve engine performance
- Enhance fuel efficiency
- Reduce the risk of engine damage
Signs Your Fuel Filter Needs Replacement
Over time, a fuel filter can become clogged with debris, reducing its effectiveness. Signs that your fuel filter needs replacement include:
- Decreased engine performance
- Reduced fuel efficiency
- Difficulty starting the engine
- Engine stalling or hesitation
How Often Should You Replace It?
The frequency of replacing a fuel filter depends on several factors, including your vehicle’s make and model, driving conditions, and the manufacturer’s recommendations. Typically, fuel filters should be replaced every 15,000 to 30,000 miles.
Consulting your vehicle’s owner’s manual or speaking with a mechanic can provide more specific guidance tailored to your vehicle’s needs.
Tools and Materials You Will Need
Before starting the fuel filter replacement process, it’s crucial to gather the necessary tools and materials. Having everything on hand will make the job smoother and help you avoid unnecessary trips to the hardware store.
Essential Tools for Fuel Filter Replacement
To replace your car’s fuel filter, you’ll need a few essential tools. These include a socket wrench, which is used to loosen and tighten the fuel filter housing, and pliers, which can be helpful for gripping small parts. A fuel filter wrench is also a valuable tool, as it is specifically designed to remove and install fuel filters.

Other tools that may be necessary include a drain pan to catch any fuel spills and a rag to clean up any mess. It’s also a good idea to consult your vehicle’s repair manual to see if there are any other specific tools recommended for your particular vehicle.
Recommended Fuel Filter Brands
When it comes to choosing a replacement fuel filter, it’s essential to select a high-quality brand that meets or exceeds OEM standards. Some reputable brands include Fram, Purflux, and Wix. These brands are known for their reliability and effectiveness in filtering fuel.
- Fram: Known for their high-quality filters and wide range of applications.
- Purflux: Offers advanced filtration technology and is a popular choice among mechanics.
- Wix: Provides high-performance filters that are designed to meet or exceed OEM specifications.
Additional Supplies to Keep Handy
In addition to the essential tools and a new fuel filter, there are a few additional supplies that can be helpful to have on hand. These include gloves to protect your hands from fuel and other chemicals, safety glasses to protect your eyes, and a well-ventilated workspace to prevent inhaling fumes.
Having a fire extinguisher nearby is also a good safety precaution, as is ensuring that your workspace is clear of any flammable materials. By being prepared, you can ensure a safe and successful fuel filter replacement.
Safety Precautions to Follow
Safety is paramount when working on your vehicle, especially when it involves handling fuel systems. Ensuring your safety and the safety of those around you is crucial when undertaking a DIY auto repair at home.
Before you begin the process of replacing your car’s fuel filter, it’s essential to understand the potential hazards involved. Fuel systems can be dangerous if not handled properly, and taking the right precautions can prevent accidents.
Working in a Well-Ventilated Area
One of the most critical safety measures is to work in a well-ventilated area. Fuel vapors can be hazardous to your health, and inhaling them can lead to serious health issues. Ensure that your workspace is open to the air or has a good ventilation system to prevent the accumulation of these vapors.
Using Protective Gear
Wearing protective gear is another vital safety precaution. Gloves and safety glasses are essential for protecting yourself from fuel spills and other debris that may be encountered during the replacement process. This protective gear can significantly reduce the risk of injury.
Handling Fuel Safely
Handling fuel requires caution. Be careful not to spill fuel on your skin or clothing, as it can cause irritation and other health issues. In case of a spill, clean the area immediately and wash your hands thoroughly. It’s also a good practice to have a fire extinguisher nearby when working with fuel.
By following these safety precautions, you can ensure a cost-effective DIY fuel filter replacement that is both safe and successful. Remember, safety should always be your top priority when working on your vehicle.
Finding the Right Replacement Fuel Filter
The key to a successful DIY fuel system repair lies in choosing the correct replacement fuel filter. Ensuring your car runs smoothly requires a fuel filter that matches your vehicle’s specifications.
Checking Your Vehicle’s Specifications
To find the right replacement fuel filter, you need to check your vehicle’s specifications. The best place to start is by consulting your owner’s manual or the manufacturer’s website. These resources will provide the necessary information to determine the correct type and size of fuel filter for your vehicle.
It’s also a good idea to check the label on the existing fuel filter, as it often contains vital information such as the part number or specifications.
Where to Buy Fuel Filters
Once you’ve identified the correct fuel filter for your vehicle, the next step is to decide where to purchase it. You have two primary options: online retailers and local auto parts stores.
| Retailer Type | Advantages | Disadvantages |
|---|---|---|
| Online Retailers | Convenience, wide selection, competitive prices | Waiting time for shipping, potential for incorrect ordering |
| Local Auto Parts Stores | Immediate availability, expert advice, no shipping wait | Limited selection, potentially higher prices |
Online Retailers vs. Local Stores
When deciding between online retailers and local stores, consider factors such as price, quality, and shipping time. Online retailers like Amazon or eBay often offer a wide selection and competitive prices, but you’ll need to wait for the item to be shipped. Local auto parts stores, on the other hand, provide immediate availability and expert advice, though their selection might be limited and prices could be higher.
“The right fuel filter is crucial for maintaining your vehicle’s performance and longevity. Always check your vehicle’s specifications before making a purchase.”
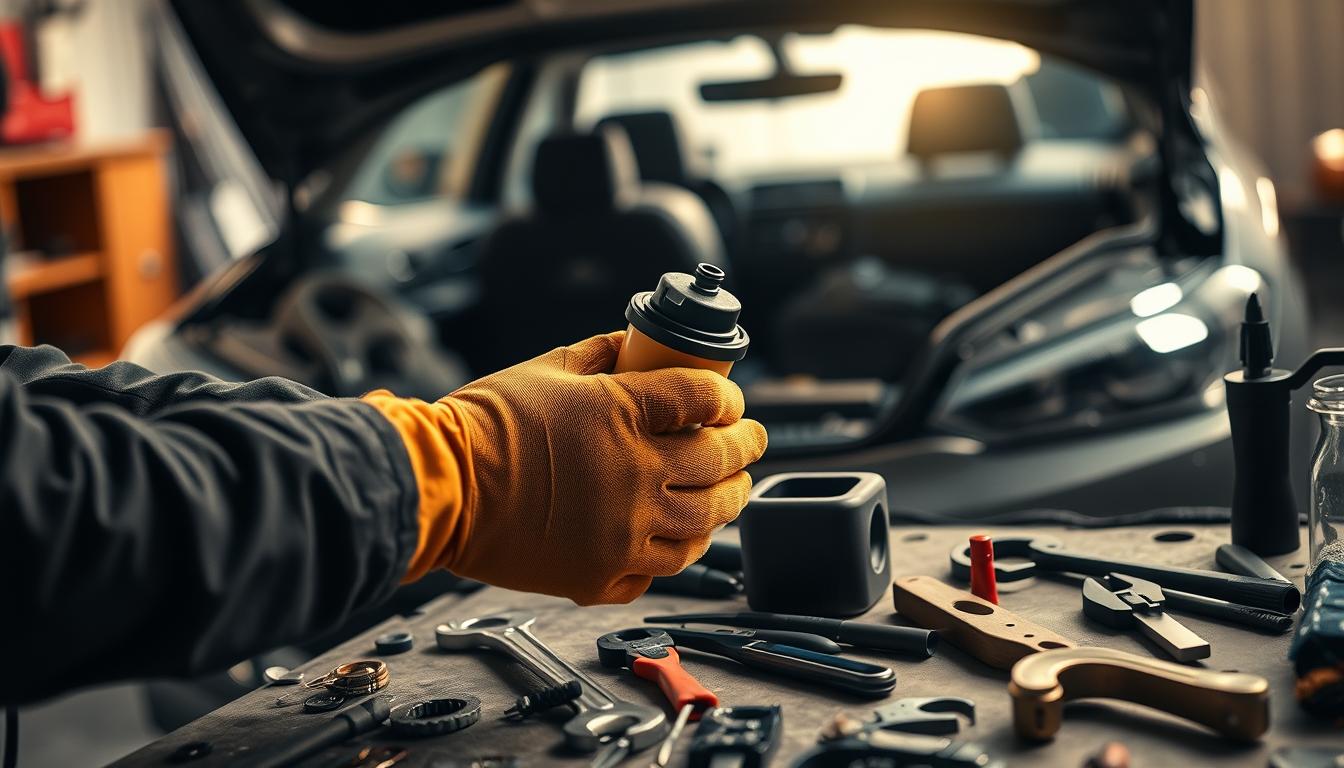
For a visual guide on identifying and replacing fuel filters, refer to the following image: 
Preparing Your Vehicle for the Job
To ensure a smooth and safe DIY fuel filter replacement process, your vehicle needs to be prepared correctly. This involves a few crucial steps that will help prevent accidents and ensure the replacement process goes smoothly.
Parking on Level Ground
First and foremost, it’s essential to park your vehicle on level ground. This is crucial for safety and to ensure that the fuel system is not under uneven pressure, which could complicate the replacement process. Engage the parking brake to secure the vehicle in place.
Disconnecting the Battery
Next, you’ll need to disconnect the battery to prevent any accidental engine starts. This is a critical safety precaution when working with fuel systems. Locate the battery and loosen the nut on the negative (black) cable clamp using a wrench. Then, pull the clamp off the negative terminal and secure it away from the battery to prevent it from accidentally coming into contact with the terminal.
Relieving Fuel System Pressure
Relieving the fuel system pressure is another vital step. The fuel system in your vehicle is pressurized, and if you don’t relieve this pressure before disconnecting any fuel lines, you could be sprayed with fuel. To do this, locate the fuel pressure relief valve, typically found on the fuel rail. Use a suitable tool to release the pressure, and be prepared for any fuel that might spill out.
| Preparation Step | Purpose | Safety Benefit |
|---|---|---|
| Parking on Level Ground | Ensures vehicle stability | Prevents accidents due to uneven ground |
| Disconnecting the Battery | Prevents accidental engine start | Reduces risk of injury or death |
| Relieving Fuel System Pressure | Reduces fuel spray risk | Minimizes risk of fuel-related fires or injuries |
By following these steps, you’ll be well-prepared to replace your vehicle’s fuel filter safely and effectively. Remember, safety should always be your top priority when performing DIY car maintenance tasks.
Step-by-Step Guide to Replacing the Fuel Filter
Replacing your car’s fuel filter is a simple yet crucial maintenance task that can significantly improve your vehicle’s performance. This process involves a few key steps that, when followed correctly, can ensure your car runs smoothly and efficiently.
Locating the Fuel Filter
The first step in replacing your fuel filter is to locate it. The fuel filter is typically found along the fuel line or inside the fuel tank. Consult your vehicle’s manual to determine the exact location, as this can vary between different models.

Removing the Old Fuel Filter
Once you’ve located the fuel filter, the next step is to remove it. Start by disconnecting the fuel lines attached to the filter. Be prepared for any fuel spillage by having a container ready. After disconnecting the lines, remove any retaining clips holding the filter in place. Carefully pull out the old filter.
Installing the New Fuel Filter
With the old filter removed, it’s time to install the new one. Place the new filter in the same position as the old one, ensuring it’s securely held by any retaining clips. Reconnect the fuel lines to the new filter, making sure they’re securely attached to prevent leaks.
Double-check all connections to ensure they’re tight and not leaking. This step is crucial for maintaining the integrity of your fuel system.
Reconnecting the Fuel System
With the new fuel filter in place, it’s time to reconnect the fuel system, ensuring a secure and leak-free connection. This step is crucial for the proper functioning of your vehicle’s engine.
Cautions When Reconnecting Fuel Lines
When reconnecting fuel lines, be cautious not to overtighten, as this can damage the fittings. Use a gentle touch and follow the manufacturer’s torque specifications to avoid any potential damage.
As noted by a leading automotive expert,
“The key to a successful fuel filter replacement lies in the details, such as properly securing fuel lines.”
Ensuring Proper Fit and Sealing
Ensure that all connections are secure and properly sealed. This involves checking the fuel lines for any signs of wear or damage and replacing them if necessary. Proper sealing is essential to prevent fuel leaks.
Checking for Leaks
After reconnecting the fuel system, check for any signs of leaks. This can be done by turning the key to the ‘on’ position without starting the engine, allowing the fuel pump to pressurize the system. Inspect the connections and fuel lines carefully for any signs of leakage.
By following these steps and using the best tools for fuel filter replacement, you can ensure a successful DIY car maintenance project.
Testing Your Work
After completing the fuel filter replacement, it’s crucial to test your work to ensure everything is functioning correctly. This step is vital in DIY auto repair at home, as it helps you identify any potential issues before they become major problems.
Starting the Engine
Begin by starting the engine and listening for any unusual sounds. A smooth start indicates that the fuel system is functioning properly. If you notice any sputtering or hesitation, it may be a sign of a problem.
Observing for Leaks and Issues
With the engine running, inspect the fuel filter and surrounding areas for any signs of leaks. Check the fuel gauge to ensure it’s working correctly and that there are no unusual drops in fuel level, which could indicate a leak. Pay close attention to any fuel smells, as they can be a sign of a leak or other issue.

Road Testing Your Vehicle
The final step is to take your vehicle for a road test. Drive under various conditions to ensure the fuel system is performing as expected. Pay attention to how the vehicle accelerates and whether there are any signs of hesitation or stumbling. A successful road test confirms that your DIY auto repair at home was done correctly.
By following these steps, you can be confident that your vehicle is running smoothly and that the new fuel filter is functioning properly.
Maintenance Tips for a Fuel Filter
Maintaining your fuel filter is a simple yet effective way to ensure your car’s longevity. Regular maintenance can help prevent issues that might lead to costly repairs down the line.
Regular Inspection Tips
Inspecting your fuel filter regularly is crucial. Check for signs of wear or damage, such as cracks, leaks, or excessive dirt accumulation. It’s recommended to inspect the fuel filter every 15,000 to 30,000 miles, depending on your vehicle’s specifications and driving conditions.
During inspection, ensure that the filter is properly secured and that there are no signs of fuel leakage. If you notice any issues, it’s best to replace the filter immediately to avoid any potential problems.
When to Schedule Professional Help
If you’re unsure about any aspect of fuel filter maintenance or replacement, it’s wise to seek professional help. A mechanic can provide guidance based on your vehicle’s specific needs and conditions. Additionally, if you encounter any complex issues during the inspection, professional assistance can be invaluable.
Scheduling regular check-ups with a professional can also help in identifying potential issues before they become major problems, ensuring your vehicle remains in good condition.
Keeping Your Fuel System Clean
Keeping your fuel system clean is integral to your vehicle’s overall health. Using a high-quality fuel filter is just the first step. Regularly cleaning the fuel system and using fuel additives can help maintain optimal performance.
Moreover, ensuring that your fuel tank is free from contaminants and debris can significantly reduce the risk of clogging your fuel filter. By maintaining a clean fuel system, you can enhance your vehicle’s fuel efficiency and performance.
By following these maintenance tips, you can ensure that your fuel filter and overall fuel system remain in good condition, contributing to a cost-effective DIY fuel filter replacement and easy DIY fuel system repair.
Common Mistakes to Avoid
Understanding the common mistakes in DIY fuel filter replacement can save you time and money. When attempting to replace your car’s fuel filter at home, it’s easy to fall into certain traps that can lead to inefficiency, damage to your vehicle, or even safety hazards.
Misidentifying the Fuel Filter
One of the initial steps in replacing your fuel filter is correctly identifying its location. Misidentifying the fuel filter can lead to unnecessary work or, worse, replacing the wrong component. Always consult your vehicle’s manual or manufacturer’s instructions to ensure you’re working with the correct part.

Neglecting Safety Protocols
Safety should always be your top priority when working with fuel systems. Neglecting safety protocols can expose you to harmful chemicals, risk of fire, or explosions. Ensure you’re working in a well-ventilated area, wearing protective gear, and following proper procedures for handling fuel.
“Safety is not just a precaution, it’s a necessity when dealing with potentially hazardous materials like fuel,” emphasizes a leading automotive safety expert.
Improper Disposal of Old Filters
After replacing your fuel filter, it’s crucial to dispose of the old one properly. Fuel filters can contain hazardous materials that shouldn’t be thrown away in regular trash. Check with local recycling centers or auto parts stores to see if they accept used fuel filters for proper disposal.
- Check local regulations for hazardous waste disposal.
- Participate in community recycling programs for automotive parts.
- Properly drain the fuel filter before disposal to minimize environmental impact.
Troubleshooting Issues After Replacement
Troubleshooting after a DIY fuel filter replacement can help you identify and fix problems early on. Even with a successful replacement, some car owners may encounter issues that need to be addressed to ensure their vehicle runs smoothly.
Engine Performance Problems
If you notice a decrease in engine performance after replacing your fuel filter, it could be due to a few factors. First, check that the new fuel filter is properly installed and that there are no leaks in the fuel system. A misfiring engine could indicate that the fuel filter is clogged or that there’s an issue with the fuel pump.
As Automotive Expert John Smith once said, “A well-maintained fuel system is key to a vehicle’s overall performance and longevity.” Ensuring that your fuel system is in good condition is crucial for avoiding performance issues.
Warning Lights on Dashboard
If warning lights appear on your dashboard after a fuel filter replacement, it’s essential to diagnose the issue promptly. Modern vehicles are equipped with sophisticated diagnostic systems that can detect problems in the fuel system. Check your vehicle’s manual to understand what the warning light indicates.
- Check the fuel filter installation for any signs of leakage or improper fitting.
- Ensure all connections are secure and not loose.
- If the light persists, consider consulting a professional mechanic for a detailed diagnosis.
Persistent Fuel Smell
A persistent fuel smell after replacing your fuel filter could indicate a leak in the fuel system. Inspect the fuel lines and connections for any signs of damage or leakage. If you find a leak, tighten the connections or replace the damaged parts as necessary.
“A fuel leak is a serious issue that requires immediate attention to prevent safety hazards and further damage to your vehicle.”
By following these troubleshooting steps, you can identify and resolve issues that arise after a fuel filter replacement, ensuring your vehicle continues to run efficiently and safely.
Knowing When to Seek Professional Help
While DIY fuel filter replacement is feasible, knowing when to seek professional help is crucial. Replacing a fuel filter can be a straightforward task if you have the best tools for fuel filter replacement and follow the correct procedure. However, certain situations may arise that require the expertise of a professional mechanic.
Types of Fuel System Failures
Fuel system failures can manifest in various ways, including decreased engine performance, difficulty starting the engine, or a noticeable decrease in fuel efficiency. If you experience any of these symptoms, it’s essential to diagnose the problem accurately. As noted by a leading automotive expert, “Fuel system issues can be complex and require a thorough understanding of modern vehicle systems.” Proper diagnosis is key to effective repair.
- Clogged fuel injectors
- Faulty fuel pumps
- Leaks in the fuel system
The Role of a Mechanic
A professional mechanic brings expertise and specialized tools to diagnose and repair complex fuel system issues. They can provide a detailed assessment of your vehicle’s condition and recommend the necessary repairs. As emphasized by a seasoned mechanic, “The right diagnosis is crucial for effective repair, and our experience helps us identify issues quickly.”
Mechanics can also offer guidance on maintenance practices to prevent future problems, ensuring your vehicle runs smoothly and efficiently.
Cost vs. DIY Savings
While DIY auto repair at home can save money, there are instances where the cost of professional help is justified. Complex repairs, such as those involving fuel system failures, may require specialized equipment and expertise, making professional assistance the more cost-effective option in the long run.
“Investing in professional repairs can save you money by preventing further damage and ensuring the job is done right the first time.”
Ultimately, understanding when to seek professional help can save you time, money, and stress. By recognizing the limits of DIY repairs and knowing when to consult a professional, you can ensure your vehicle receives the care it needs.
Environmental Considerations
As you embark on the easy DIY fuel system repair, consider the environmental impact of your actions. Replacing your car’s fuel filter is a maintenance task that not only improves your vehicle’s performance but also has significant environmental implications.
Proper Disposal of Old Fuel Filters
One of the critical aspects of environmentally friendly car maintenance is the proper disposal of used parts, such as old fuel filters. These filters contain fuel residues and other harmful substances that can contaminate soil and water if not disposed of correctly. To avoid environmental pollution, take your used fuel filter to a recycling center or an auto parts store that accepts used filters for proper disposal.
It’s crucial to handle used fuel filters with care. Always wear protective gloves when handling used filters to prevent skin contact with potentially hazardous materials.
Recycling Options
Besides disposing of old fuel filters, there are other recycling options you can explore as part of your cost-effective DIY fuel filter replacement routine. Many auto parts stores have programs in place for recycling old car parts. You can also consider recycling other vehicle components, such as used oil, batteries, and tires, which can significantly reduce the environmental footprint of your vehicle maintenance activities.
“The earth has enough resources for our need, but not enough to satisfy our greed.” – Mahatma Gandhi
Reducing Your Carbon Footprint
Regular vehicle maintenance, including cost-effective DIY fuel filter replacement, plays a significant role in reducing your carbon footprint. A well-maintained engine runs more efficiently, consumes less fuel, and emits fewer pollutants. By ensuring your vehicle is in good condition, you’re not only saving money on fuel costs but also contributing to a cleaner environment.
Regular maintenance is key to a sustainable automotive practice. By adopting environmentally conscious habits, such as proper disposal and recycling, you can significantly reduce the environmental impact of your vehicle ownership.
Benefits of DIY Fuel Filter Replacement
By choosing to replace your car’s fuel filter yourself, you can enjoy several benefits that enhance your overall car ownership experience. This simple DIY task can lead to significant advantages, from saving money to gaining valuable car maintenance knowledge.
Cost Savings
One of the most immediate benefits of DIY fuel filter replacement is the cost savings. By doing the job yourself, you can avoid labor costs associated with taking your car to a mechanic. The average cost of replacing a fuel filter at a dealership or repair shop can range from $50 to $150, depending on the make and model of your vehicle. In contrast, buying a fuel filter yourself can cost between $5 and $30.
| Service | Cost Range |
|---|---|
| Dealership/Repair Shop | $50-$150 |
| DIY Fuel Filter | $5-$30 |
Gaining Car Maintenance Knowledge
Replacing your car’s fuel filter yourself is also an excellent way to gain hands-on experience and knowledge about your vehicle’s maintenance needs. By understanding how your car works and what it needs to run efficiently, you can better diagnose issues and perform routine maintenance tasks. This knowledge can be empowering and help you feel more connected to your vehicle.
Sense of Accomplishment
Completing a DIY project like replacing your fuel filter can give you a significant sense of accomplishment. Knowing that you took on the task and completed it successfully can boost your confidence in tackling other car maintenance tasks. This sense of achievement is not just about saving money; it’s also about developing a skill that contributes to your vehicle’s longevity and performance.
In conclusion, DIY fuel filter replacement offers numerous benefits, including cost savings, gaining valuable car maintenance knowledge, and a sense of accomplishment. By taking on this task, you not only improve your vehicle’s health but also enhance your overall car ownership experience.
Conclusion: Embrace DIY Car Care
By taking on DIY auto repair at home, you can significantly enhance your vehicle’s performance and longevity. Replacing a fuel filter is just the beginning; with the right skills and knowledge, you can tackle more complex tasks like easy DIY fuel system repair.
Regular Maintenance is Key
Regular maintenance is crucial for preventing problems and extending the life of your vehicle. By staying on top of tasks like fuel filter replacement, you can avoid costly repairs down the line.
Empowering Yourself with DIY Skills
Embracing DIY car care empowers you to take control of your vehicle’s health. As you gain experience, you’ll become more confident in tackling other maintenance tasks, saving you money and enhancing your understanding of your vehicle.
Long-Term Benefits
With consistent care and attention, your vehicle will run more smoothly and efficiently, ensuring a longer lifespan. By adopting a DIY approach, you’re not only saving money but also investing in your vehicle’s future.


